Project: Suppliers
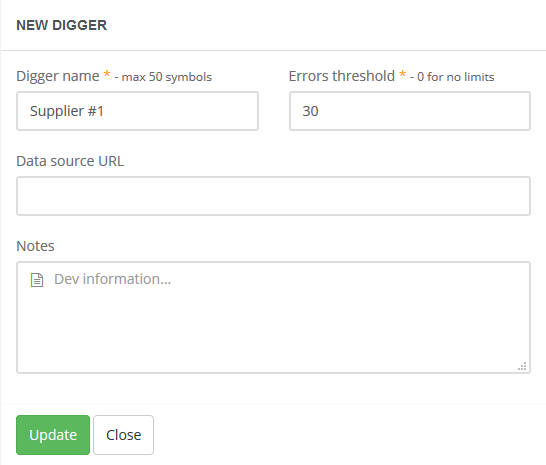
Edit Digger
We created a Supplier #1 digger and can see it now in the table Diggers.
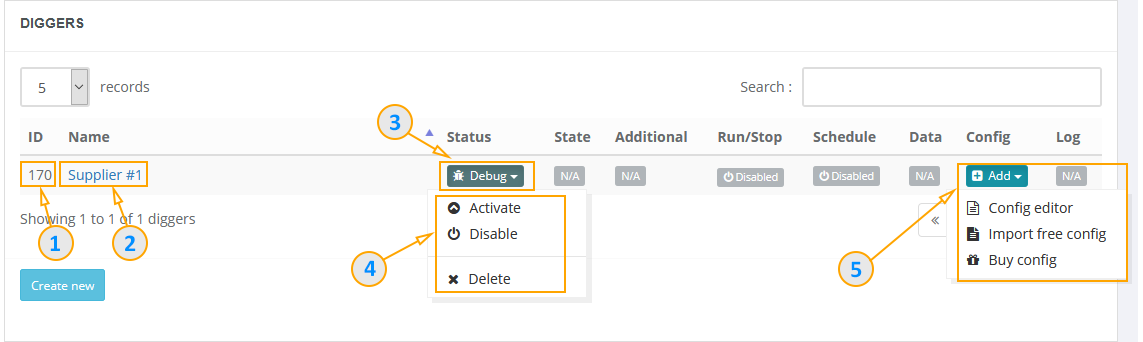
- Digger ID
- Digger Name
- Digger modes (and function to delete digger)
- Mode options
- Add config options
Digger ID is needed if you plan to work through the API and you may need to control and download data for specific digger. You can also use it when contacting support (informing this number to the operator) if you have any questions.
Clicking on the digger name opens an editing form where you can change its basic settings.
In the digger mode, you can select the following options:
Debug - set by default for each new digger. This mode will help you to develop or debug your digger configuration
without spending resources. A lot of additional information is written into the log, which allows you to see how your digger and
scraping logic works in details. This mode also has restrictions for data download and you can view just limited number of scraped records.
Active - the production mode for your digger. In this mode, you can start the digger manually or schedule digger runs. There are no
restrictions on viewing data, all the data is provided for download in various formats.
Disable - when the digger is set into this mode, it can no longer be started for execution and disconnected from execution on schedule
(if it was set up for it). This can be useful in case you have many diggers working in the same project and you need
temporarily block schedule, but without changing the schedule settings for them.
Delete - you can remove your digger from the project. The digger statistics will be kept
for further usage.
In Add config options you can go to the editor, select config import from our free repository (this feature will be described in the next section) or order a digger development.
Next