Webhook export
Webhook is an HTTP call made by the IO service after digger finishes work. During this call, the collected data will be transferred to the URL provided by Webhook with the parameters specified when setting up the export config.
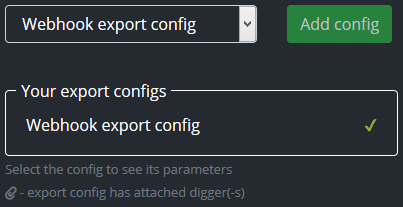
To configure the Webhook export, select the appropriate config in the list and click the - Add config button.
Let's look at the options for setting up a Webhook export.
Send data as: Dataset
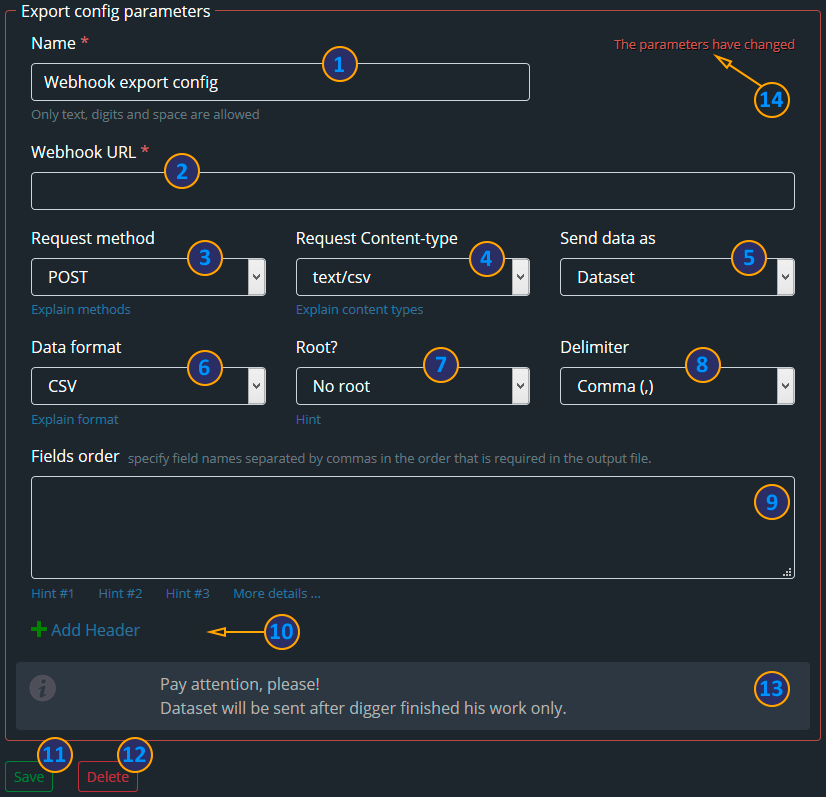
- The name of the export config.
- The URL to the webhook endpoint.
- HTTP request method.
- Request content-type.
- Send data as (Dataset).
- Output data format (CSV).
- Show / hide the root element.
- Separator for columns (CSV format).
- The order of the fields.
- Add fields to the request header.
- Save config.
- Delete config.
- Additional information.
- Change indicator.
The name of the export config - you can use any export config name that is convenient for you (the field is required).
Webhook URL - link to the request receiving endpoint on your side (the field is required).
HTTP request method - HTTP methods POST, PUT, PATCH. More information about the methods you can find by clicking on this link.
Request content-type - list of available MIME types.
Send data as - defines if the data will be sent in the form of the gathered dataset, or you want to use a template to remap the data.
Output data format - exported dataset format. Currently available: CSV, JSON/NDJSON, HTML. Each format has its own set of parameters.
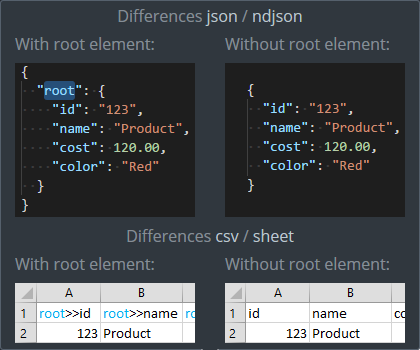
Show / hide the root element - every dataset has a root element. It's a name of the root object you set in your digger. Here you can enable or disable it. If you disable it, your root object will not be enclosed in the object name element.
Separator for columns - a set of standard separators for CSV format. You can select what character you want to use as fields separator.
The order of the fields - here you can set the order how dataset fields should be placed to the resulting dataset. If you leave this field blank, all the available fields will be listed in alphabetical order in the output dataset. You can read more about the order rules in this section.
Add fields to the request header - with this option, you can add additional parameters to the HTTP request header.

Send data as: Template
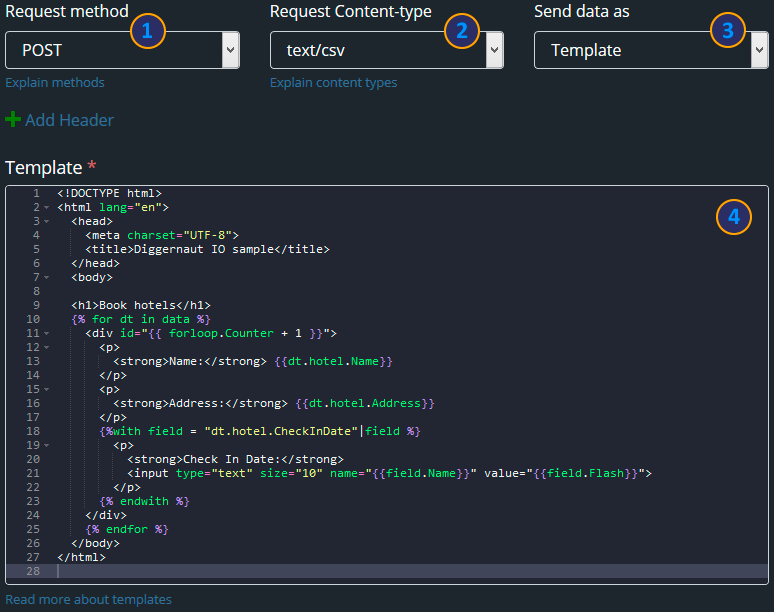
- Request method.
- Request content-type.
- Send data as (Template).
- Template editor.
Template editor - allows you to set up the structured document using any markup language (XML, HTML etc). You can read more about it in this section.
Webhook Testing
Now let's see how you can test data transfer to webhook using a third-party service Requestbin.com.
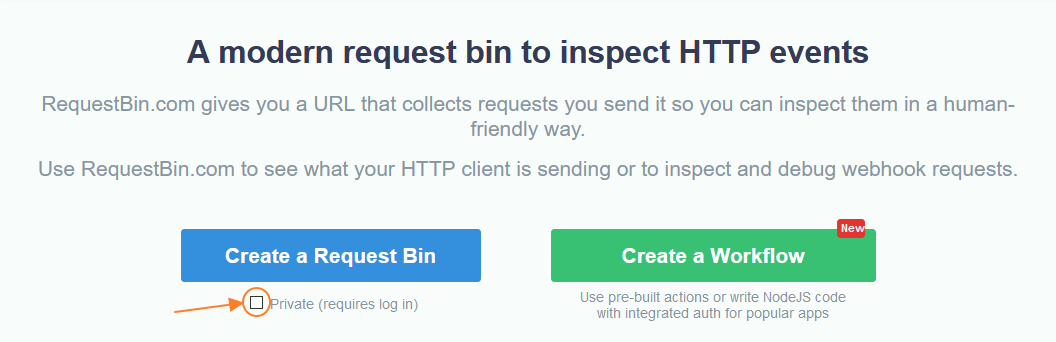
By clicking on the link you will be asked to create a request. You can disable the checkbox Private, if you do not want to register in this service. Now press the button Create a Request Bin.

In this section you need to copy the link on the top to the clipboard and paste it into your diggernaut IO webhook config form. Set additional webhook paremeters that you need and save the config. Next, attach the created config to the digger you need, run the digger and wait until it finishes working.
If everything is configured correctly, then at the end of work of the digger you will see the following (click on the POST line on the left):
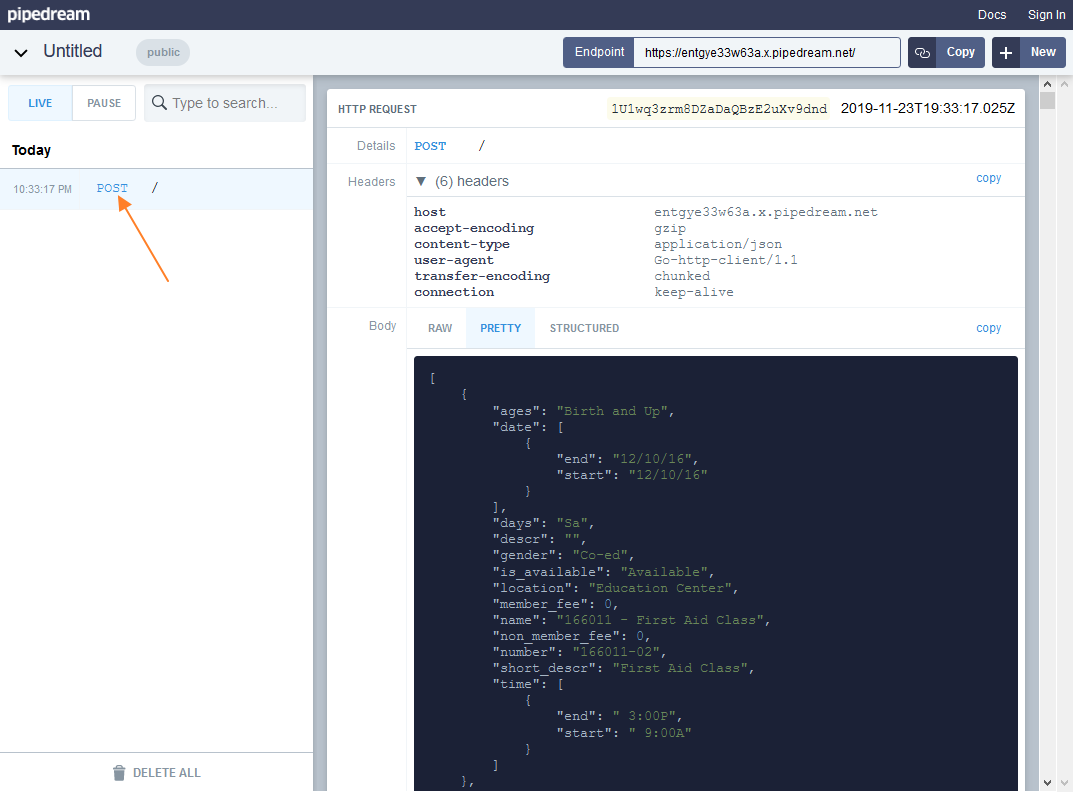
Here you can see all the request headers, as well as the data itself sent by the IO service.
In the next section, we will learn how export the data to the Google Spreadsheet.
Next