In this article we will tell and show you how to configure Diggernaut application in the Albato service. This service will help you to transfer data from your datasets to various CRM, cloud services and storages. In the current revision only our paid subscribers and users on the PAYG plan will be able to use the application. Unfortunately, free plan users don’t have such a possibility, because our export service diggernaut.io is involved in the data delivery scheme. If you want to test the bundle, and you use a free account, switch your account to the PAYG plan and write us in a chat, we will credit your account for testing.
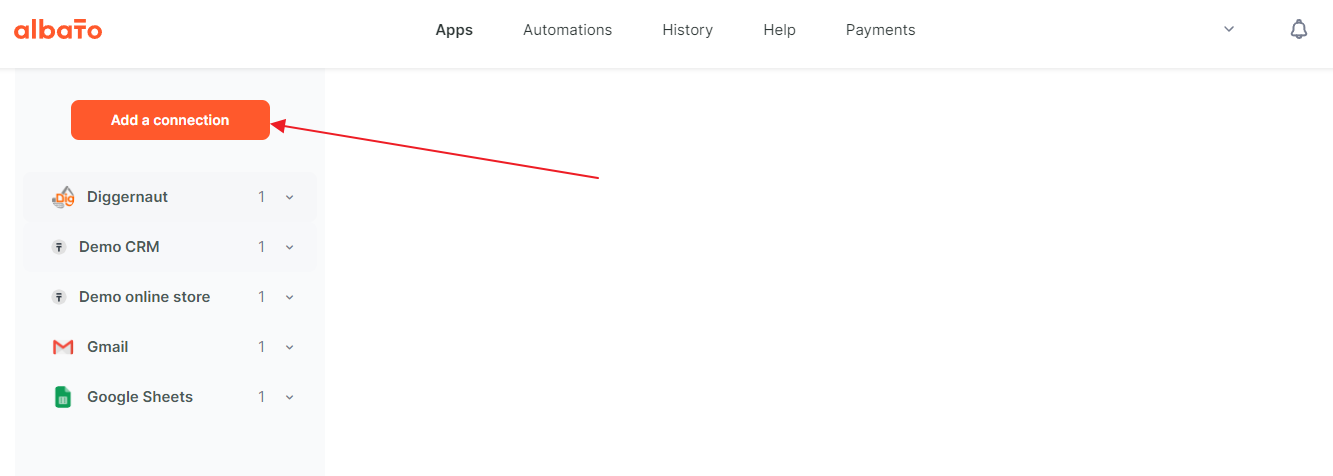
So, first you need to register in the Albato service and log into your account there. After that you will need to create a new connection by clicking on the “Add a connection” button.
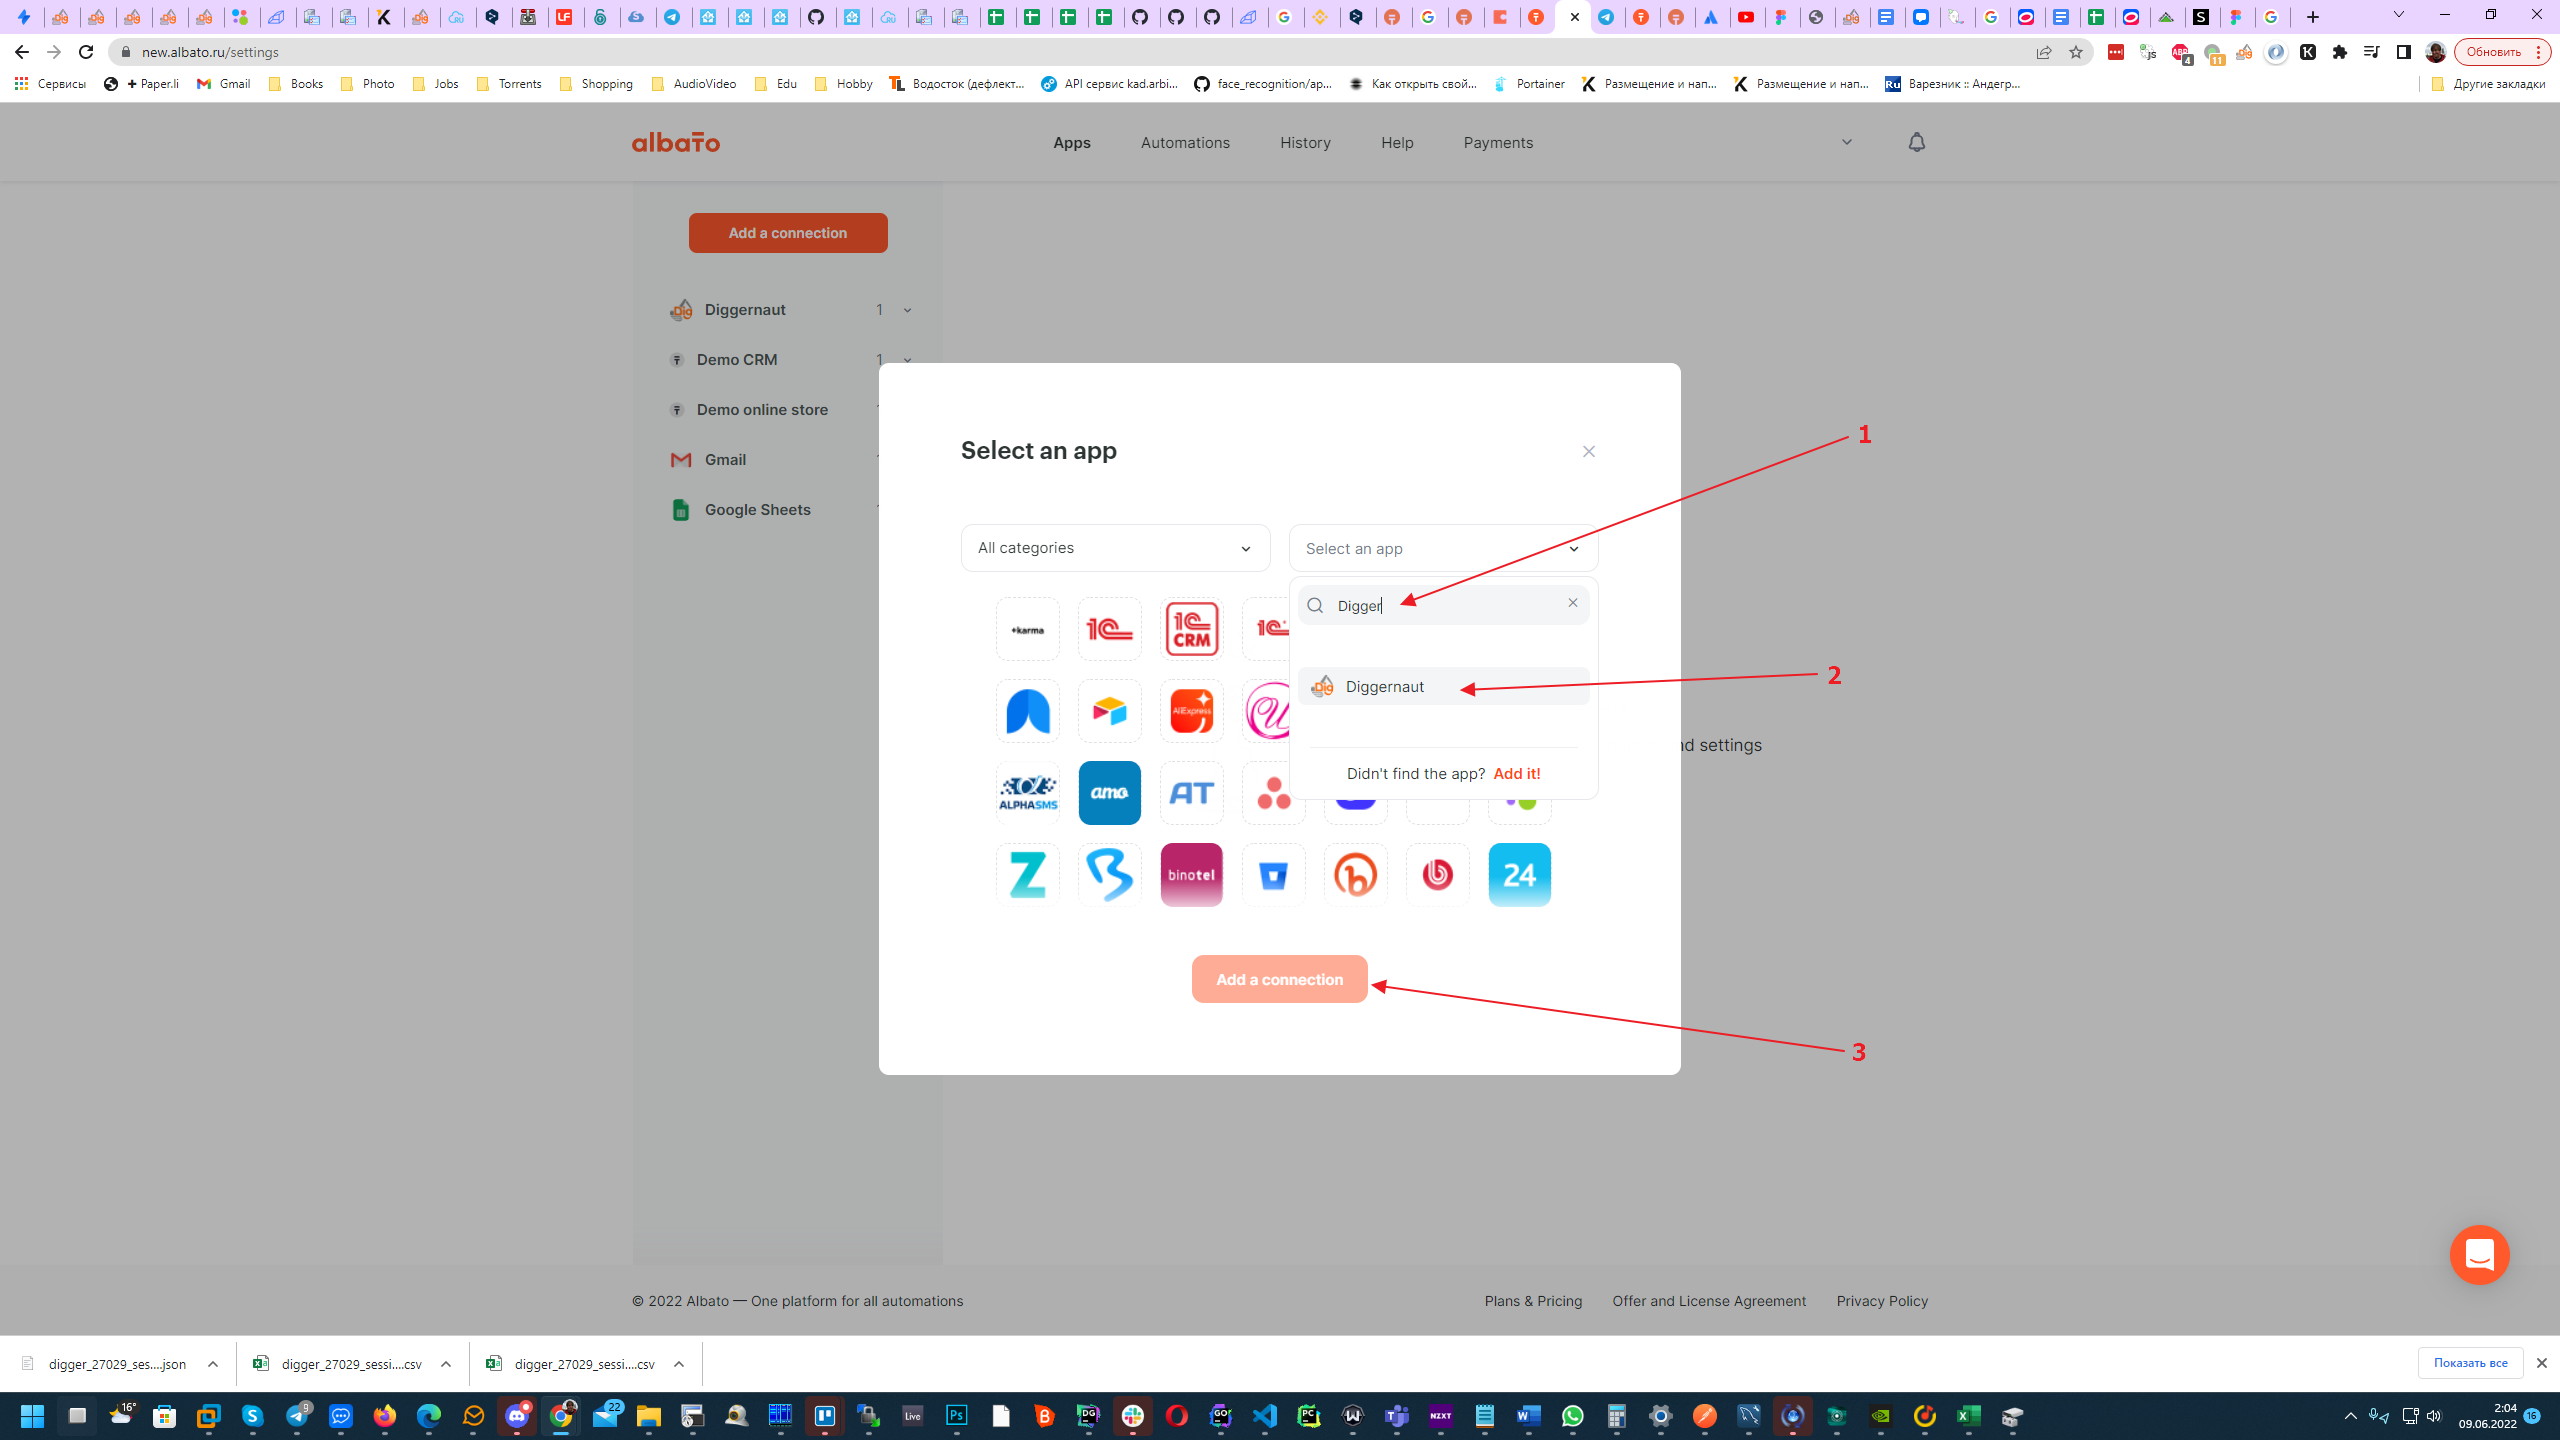
Next, you need to find and select the Diggernaut service.
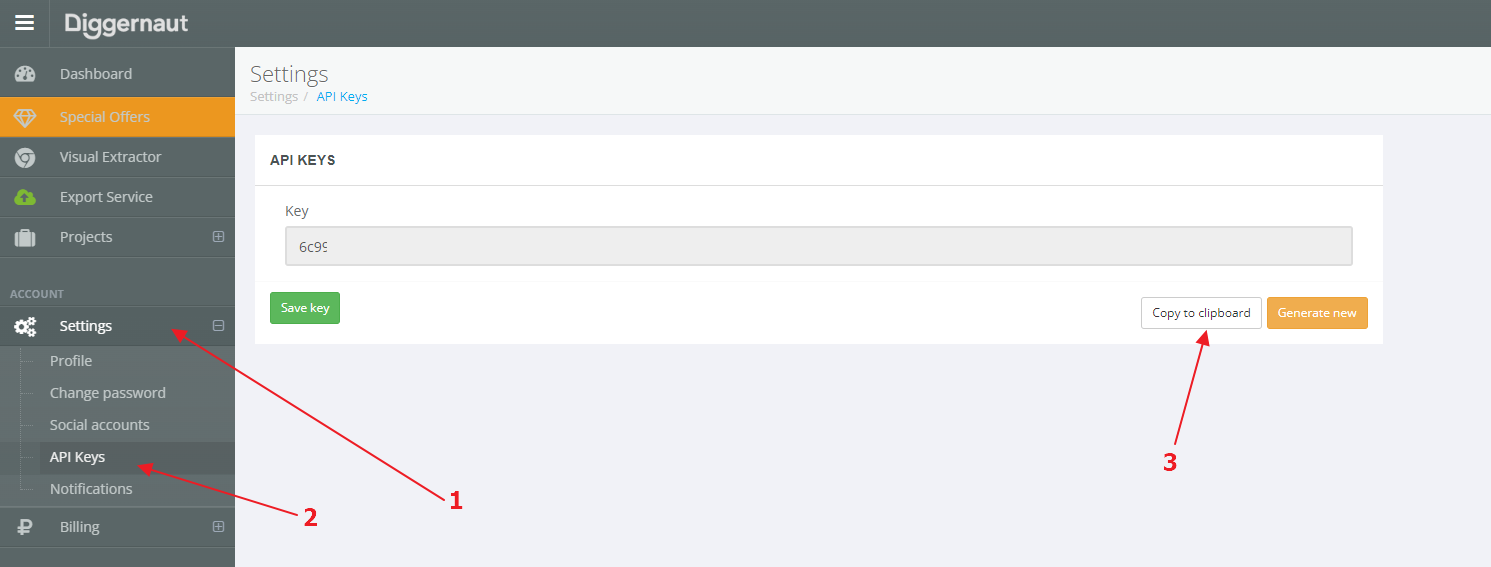
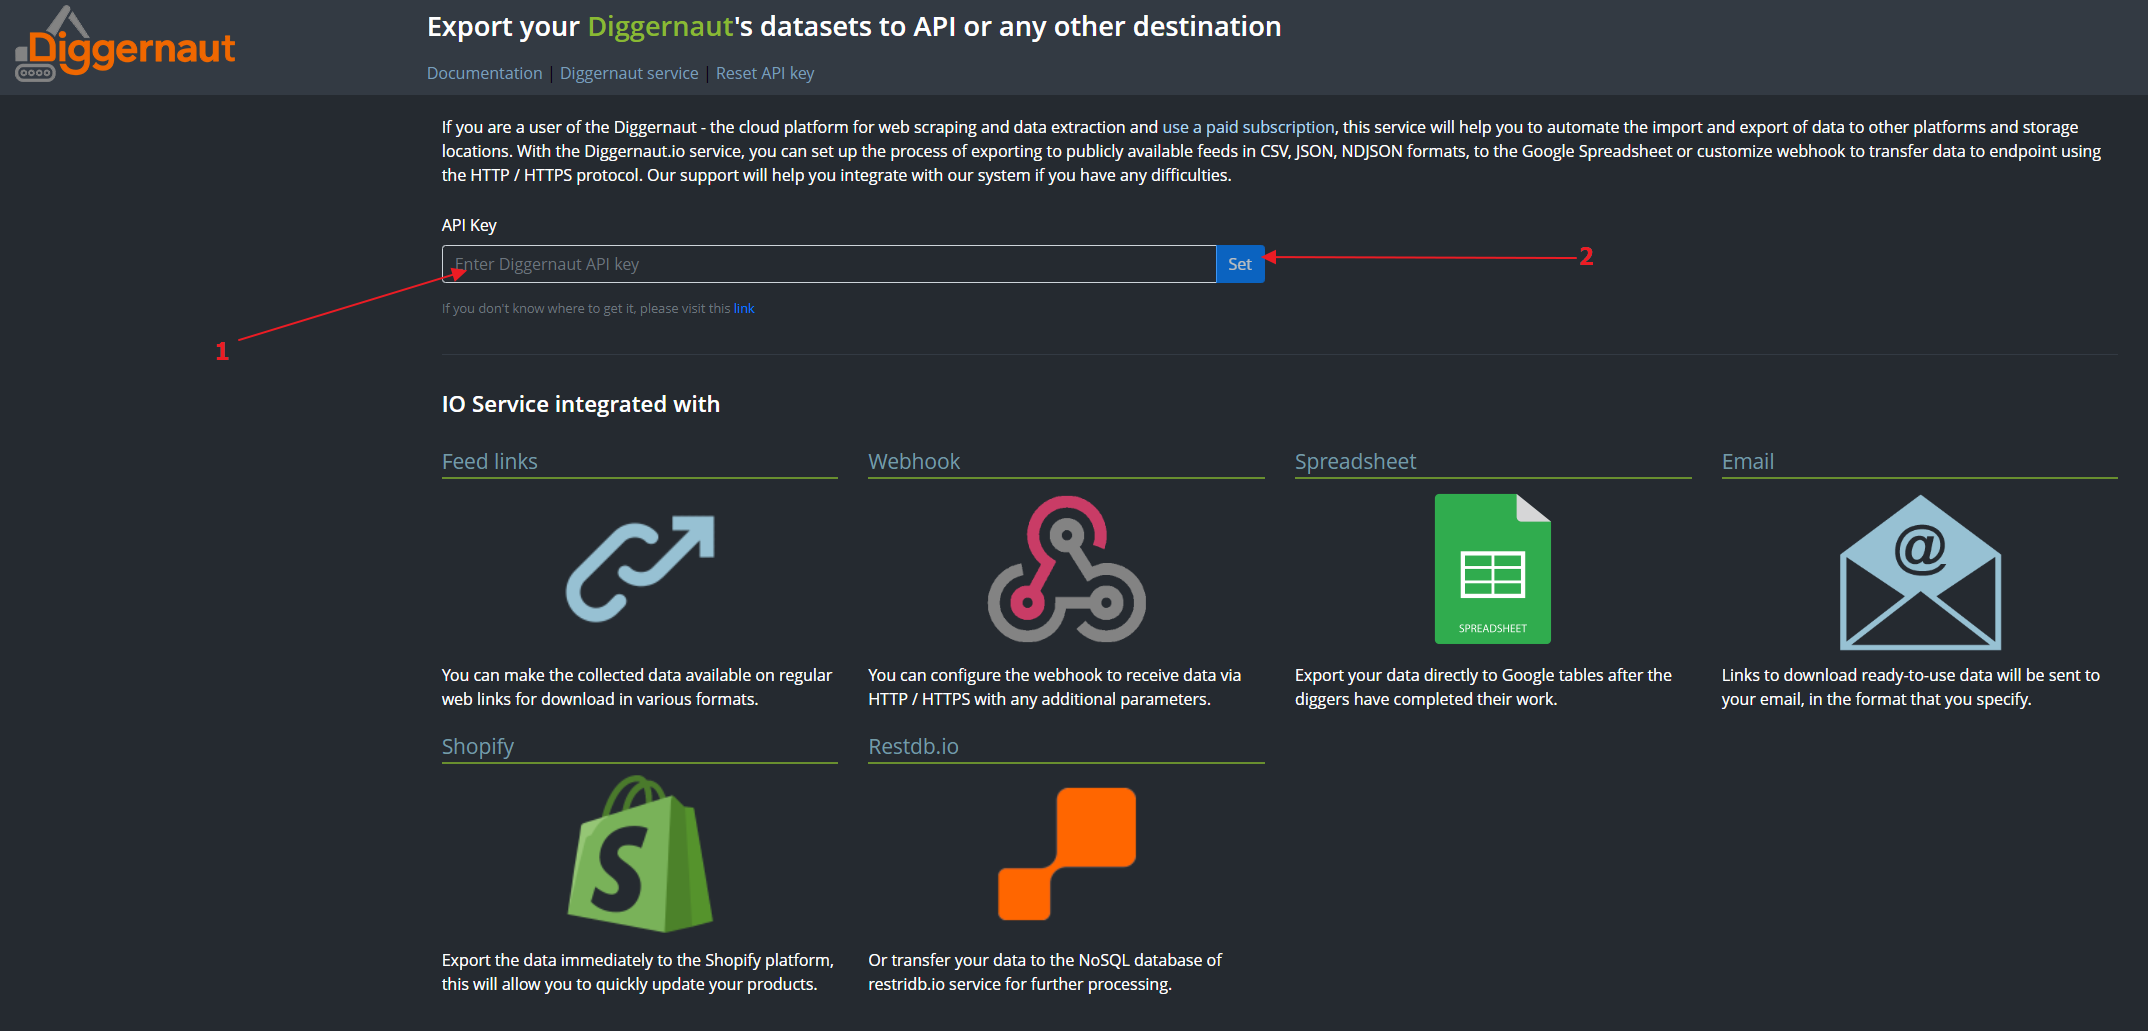
After that you will need an API key for your Diggernaut account. To get it, log into your account at Diggernaut and go to Settings -> API Keys and copy your API key to the clipboard by pressing CTRL+C or the corresponding button on the page.
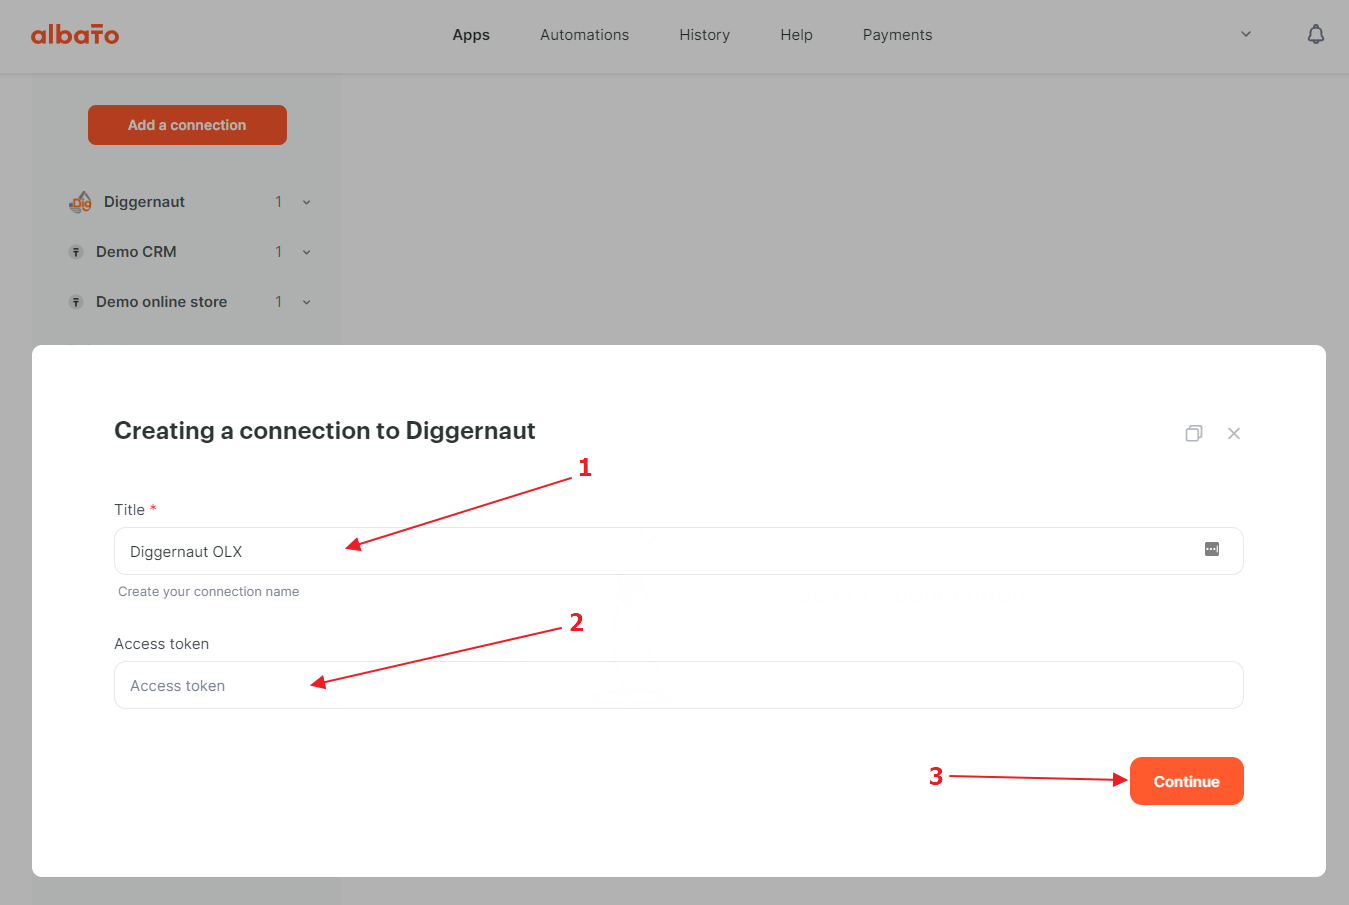
Go back to the Albato website, where we give a name to the connection. Also you need to paste your API key to the Access Token field by pressing CTRL+V. Then click on the “Continue” button.
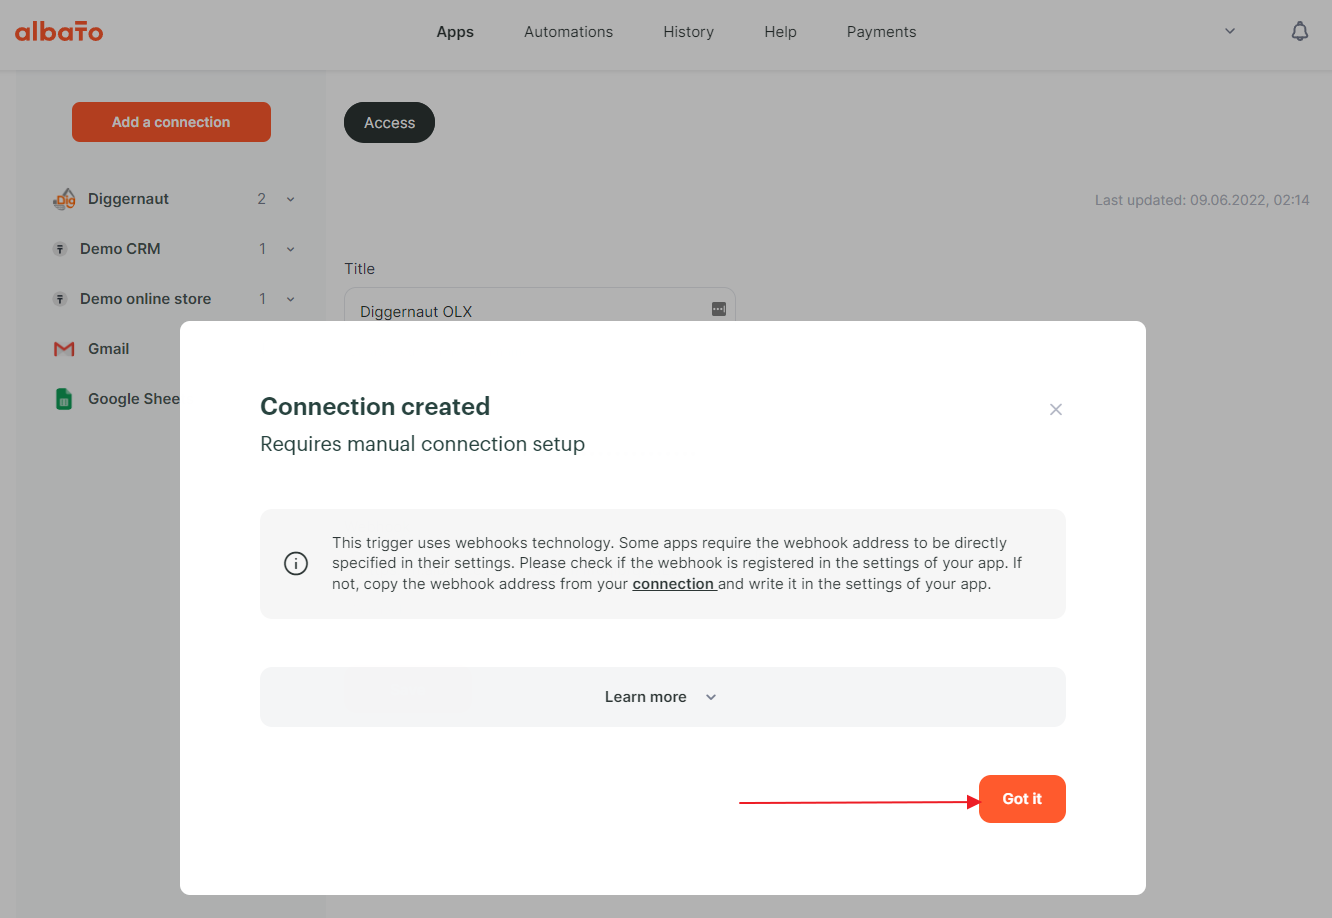
Now the connection is created and we need to click on the “Got it” button to finish with settings and move on to configuring the automation.
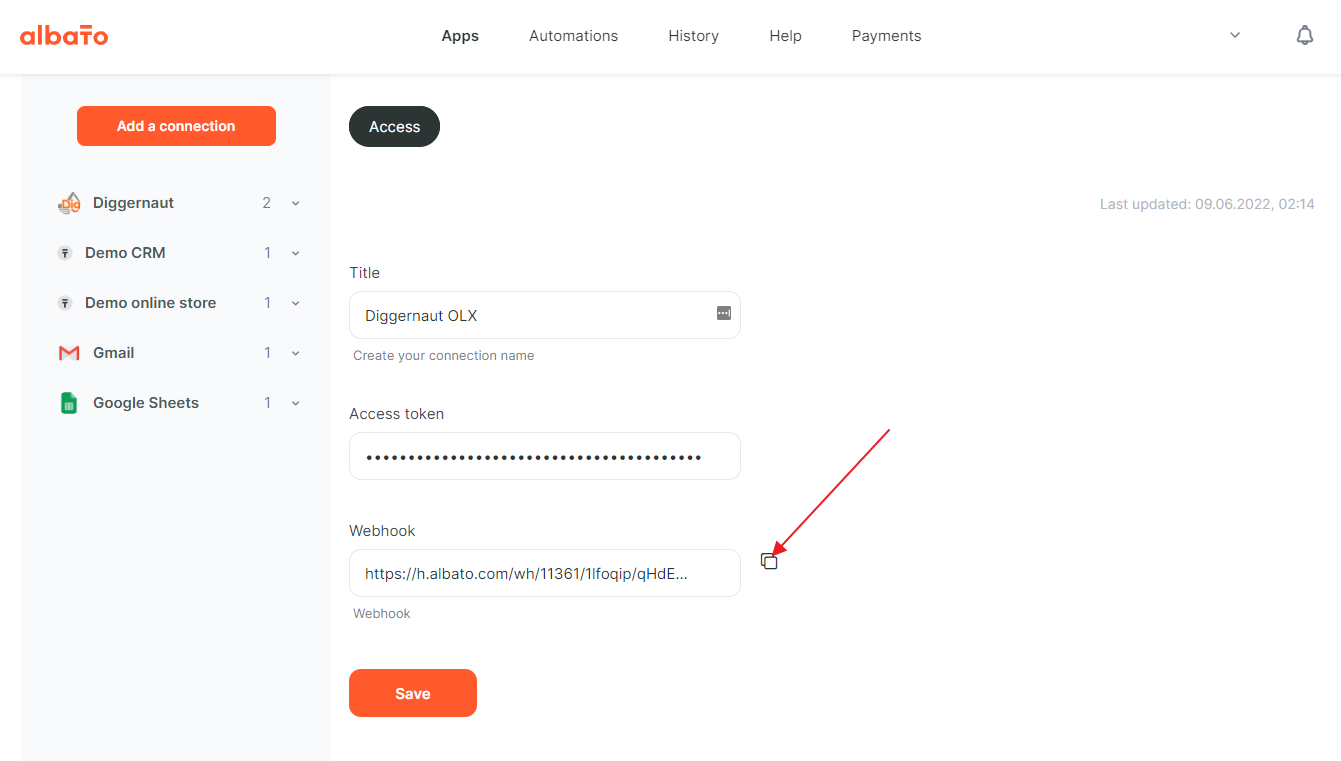
Copy the webhook URL to the clipboard. We will need it to set up exports at Diggernaut.io.
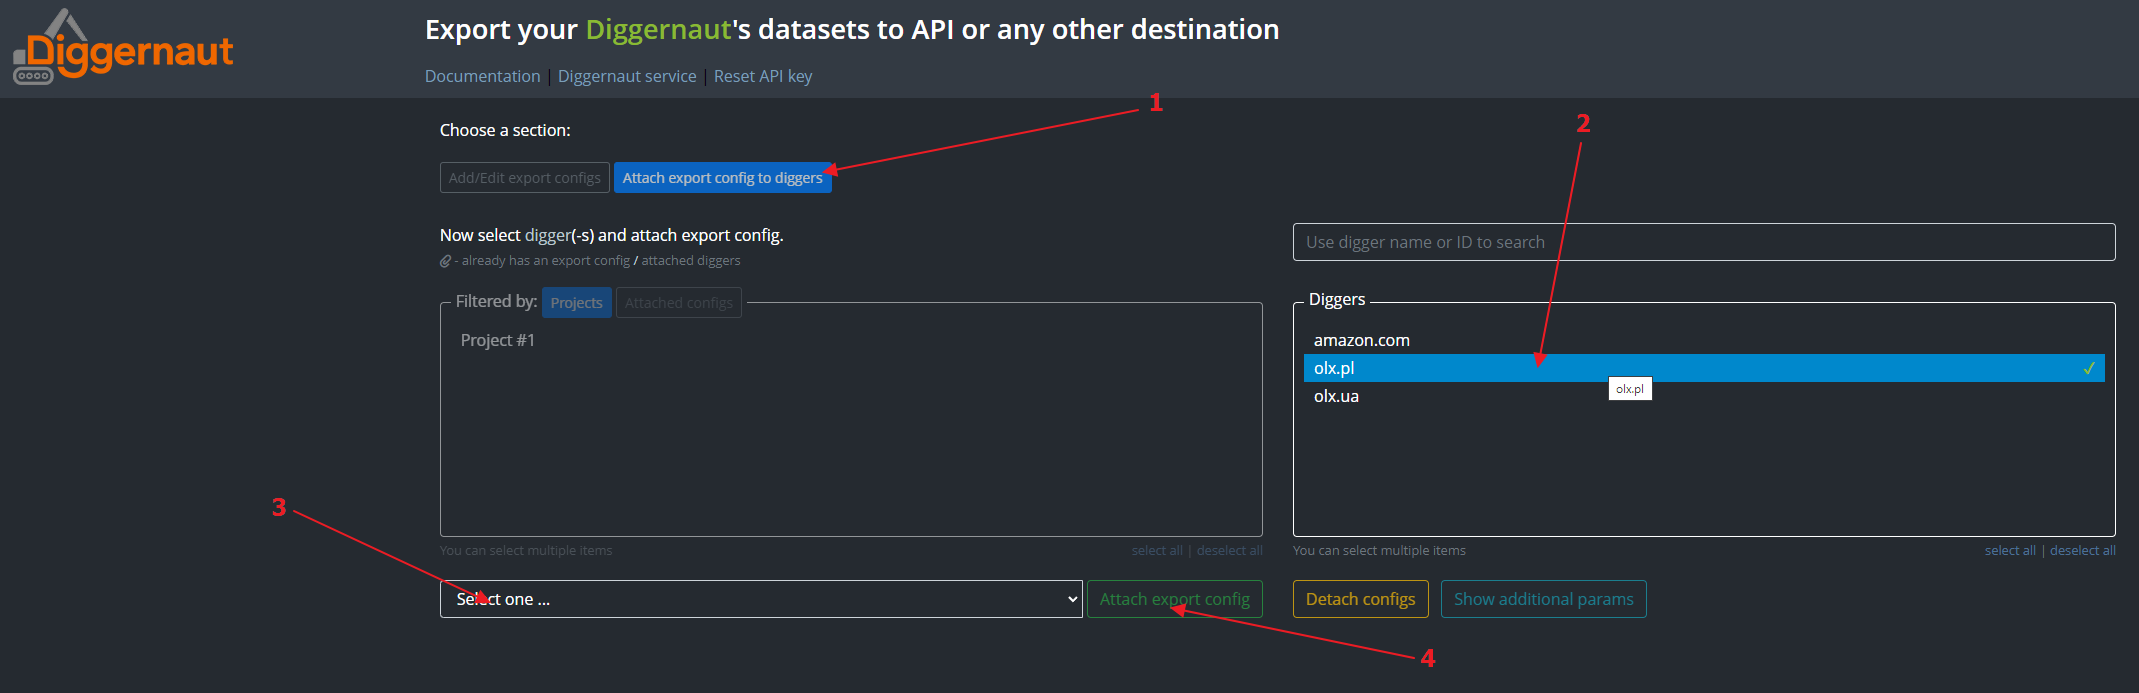
Now we will need to set up an export at the Diggernaut.io. Log in to your account using your Diggernaut account API key.
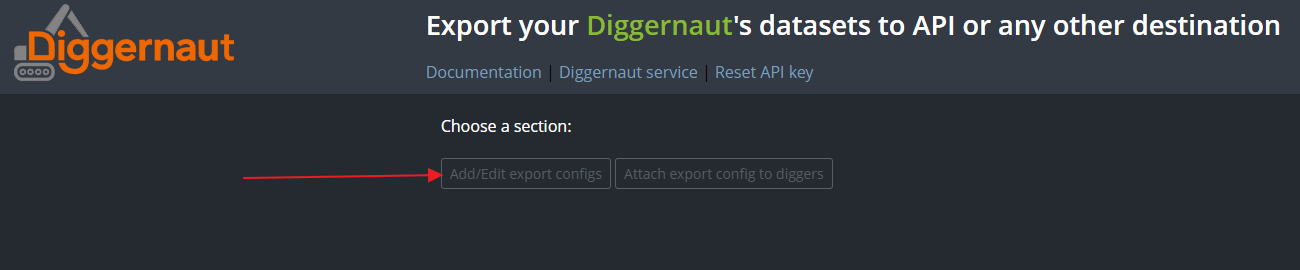
Create an export configuration.
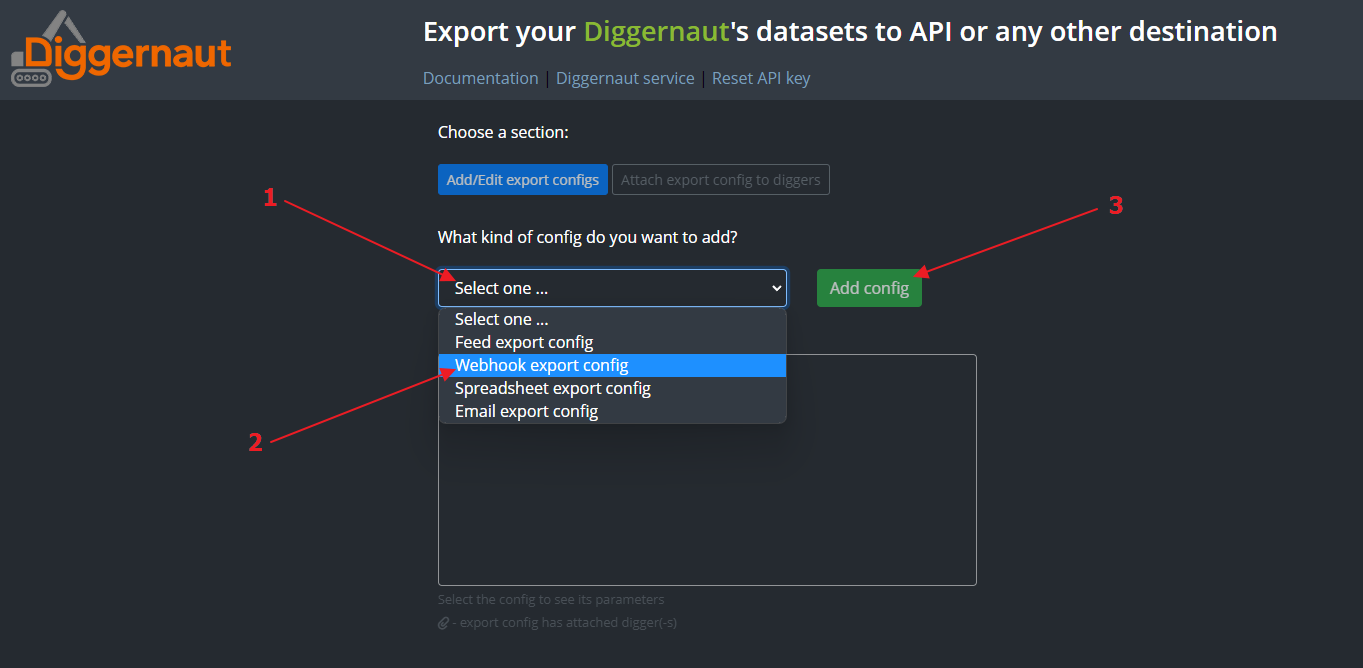
Select the configuration type: Webhook export config. and click the “Add” button.
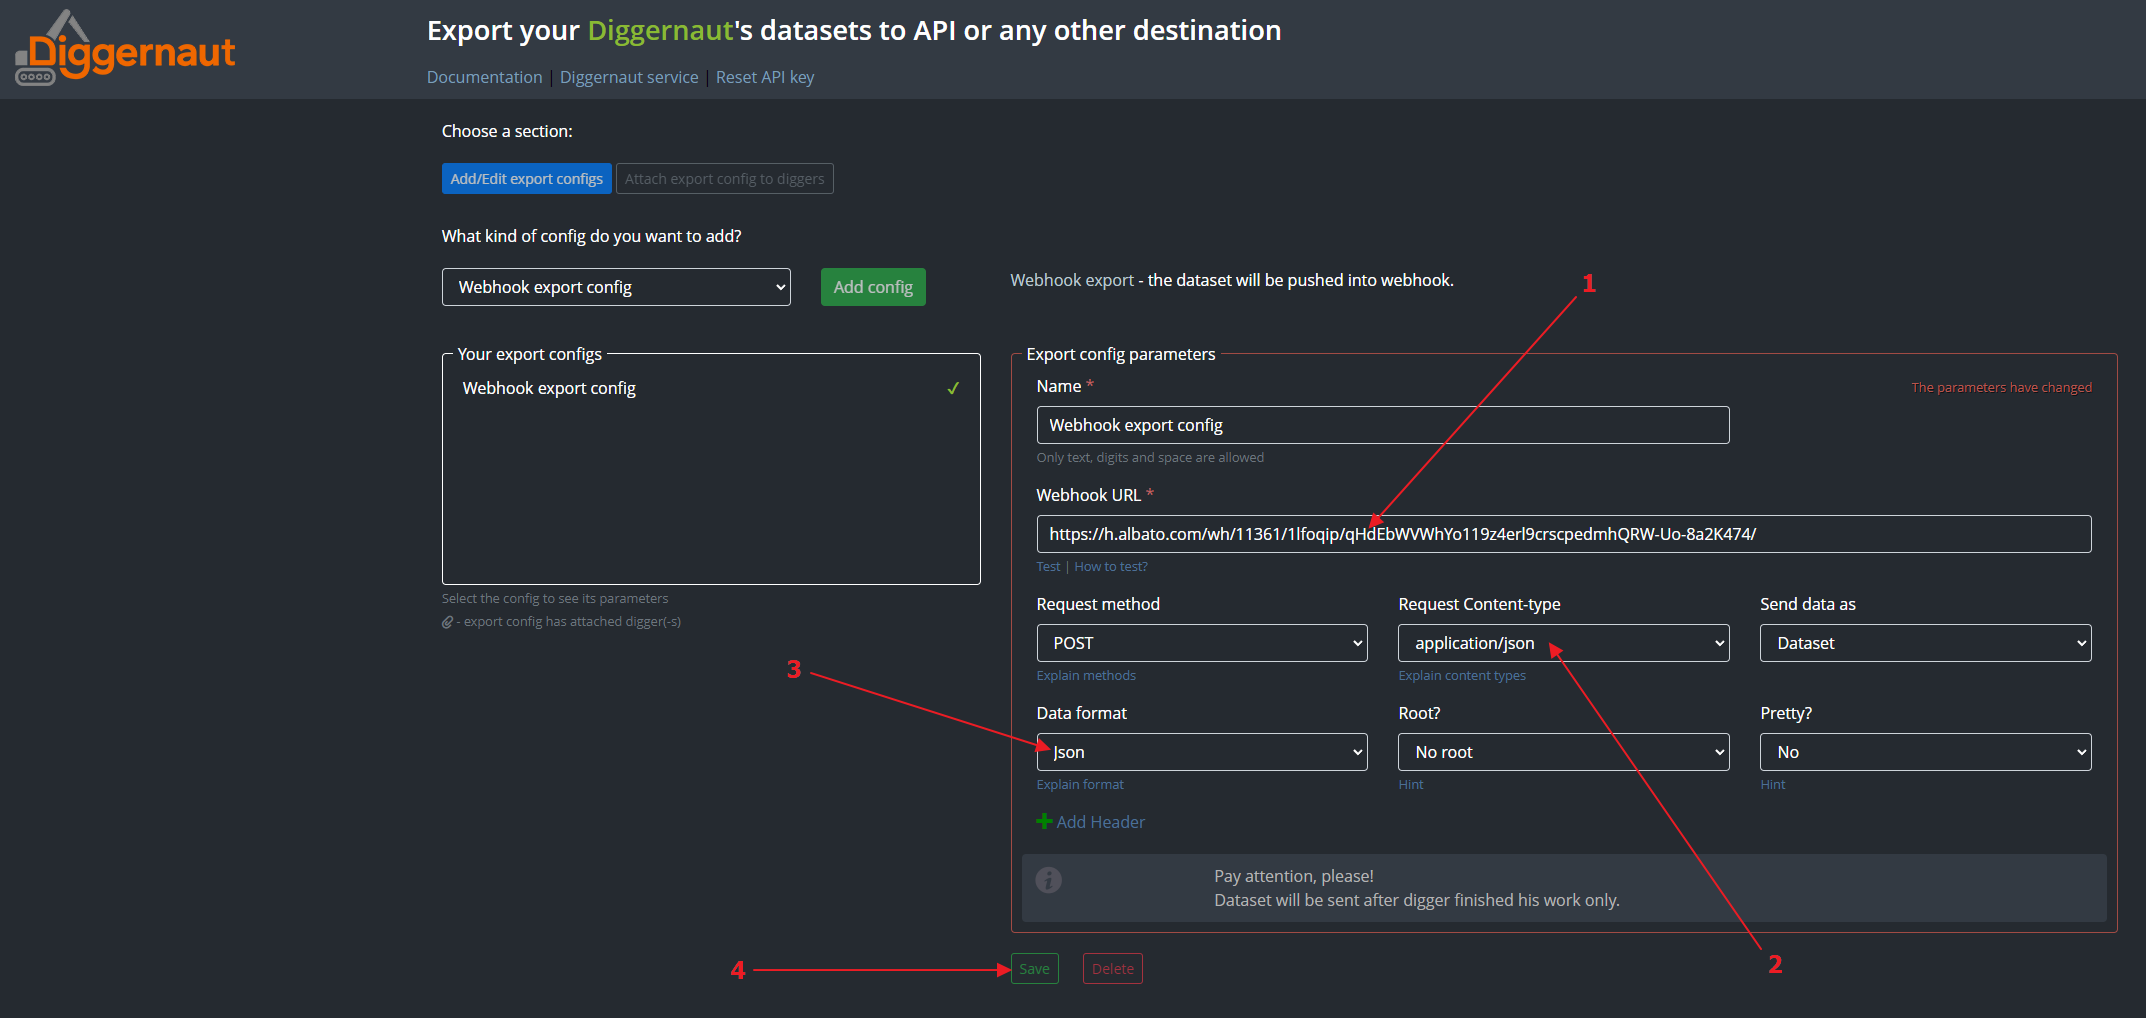
Now we need to paste the webhook from our clipboard to the Webhook URL field. For the field Request Content-type we should select the option application/json, and for the field Data format we should select the option json. You can also set any convenient name for the created configuration. Leave the values of the other fields unchanged and click the “Save” button.
Go to “Attach config to diggers”. Select the digger whose datasets we plan to export, select the config we just created and click the “Attach config” button.
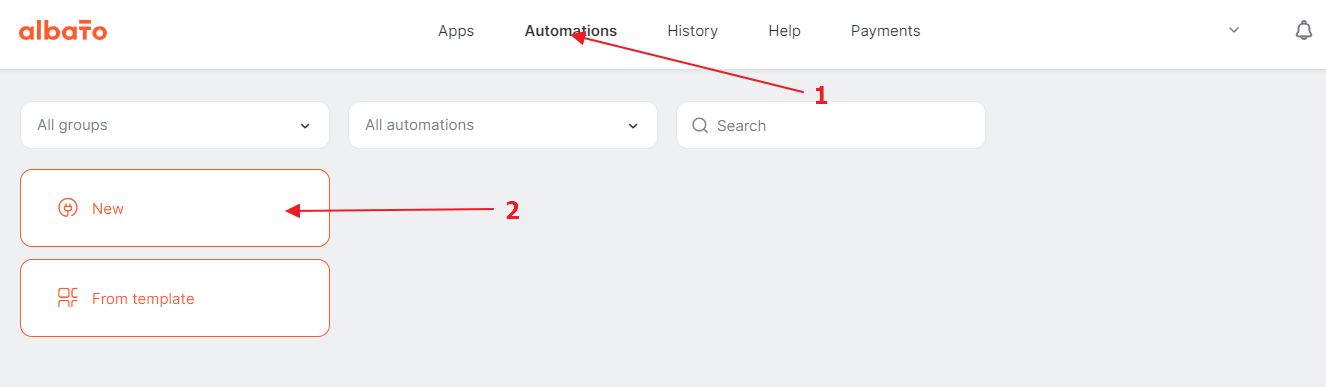
Go back to Albato again and create an automation.
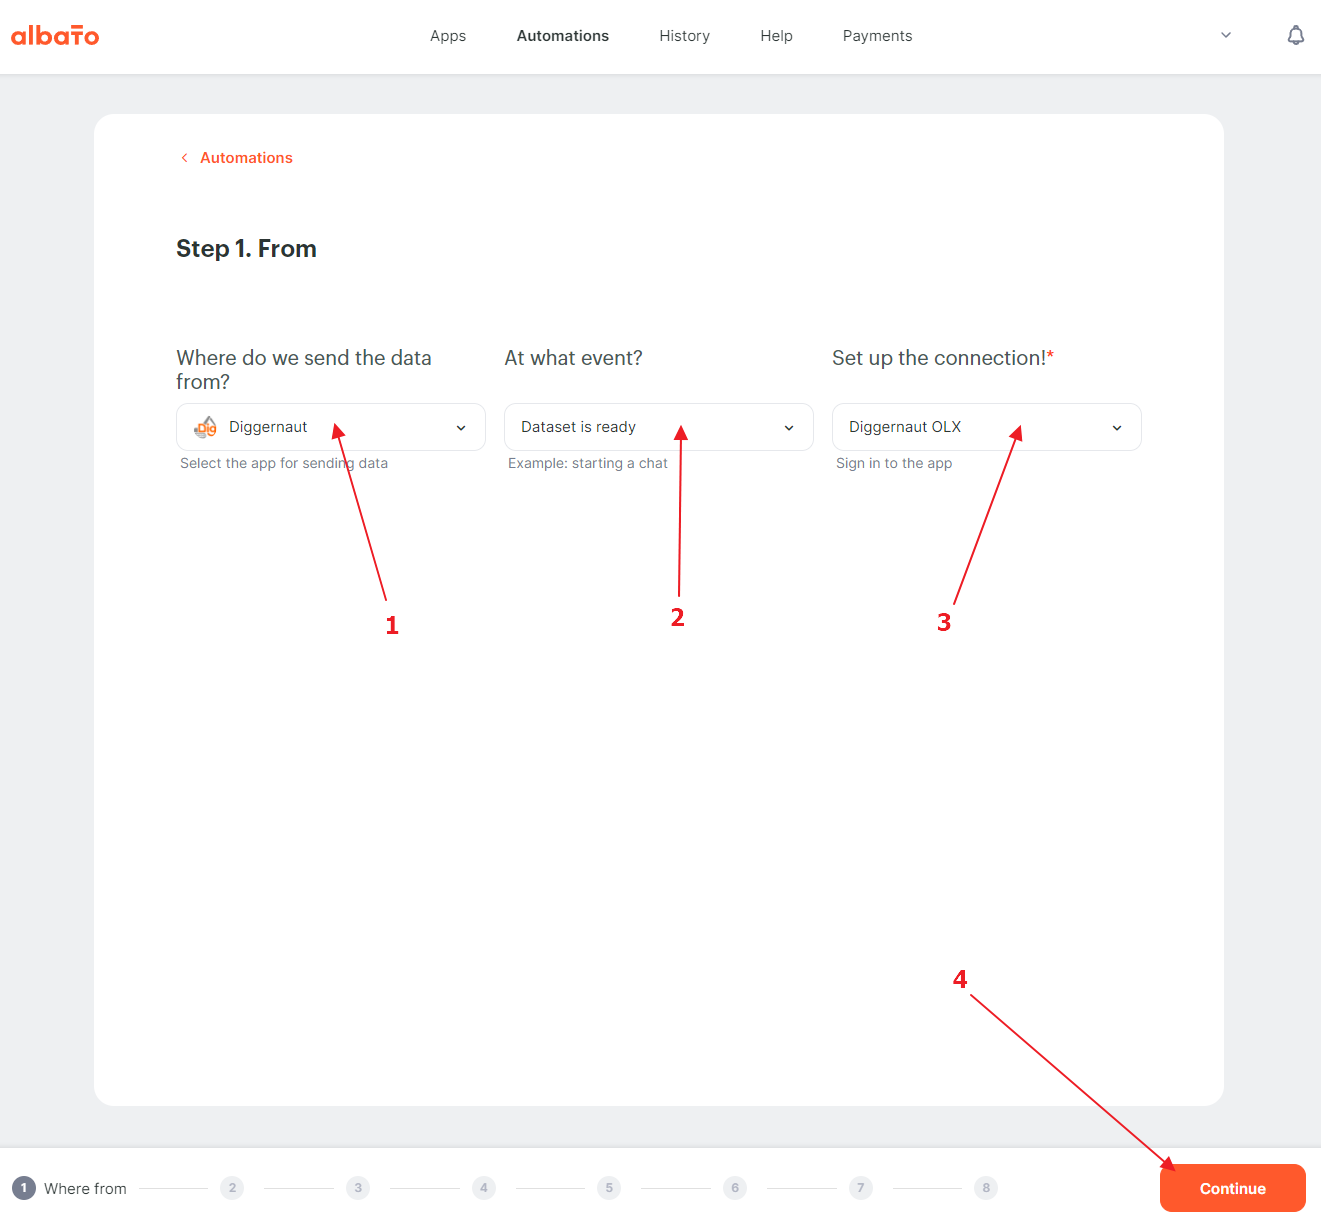
We need to select the service from which we will retrieve data – Diggernaut, select the “Dataset ready” trigger and select the connection that we created before.
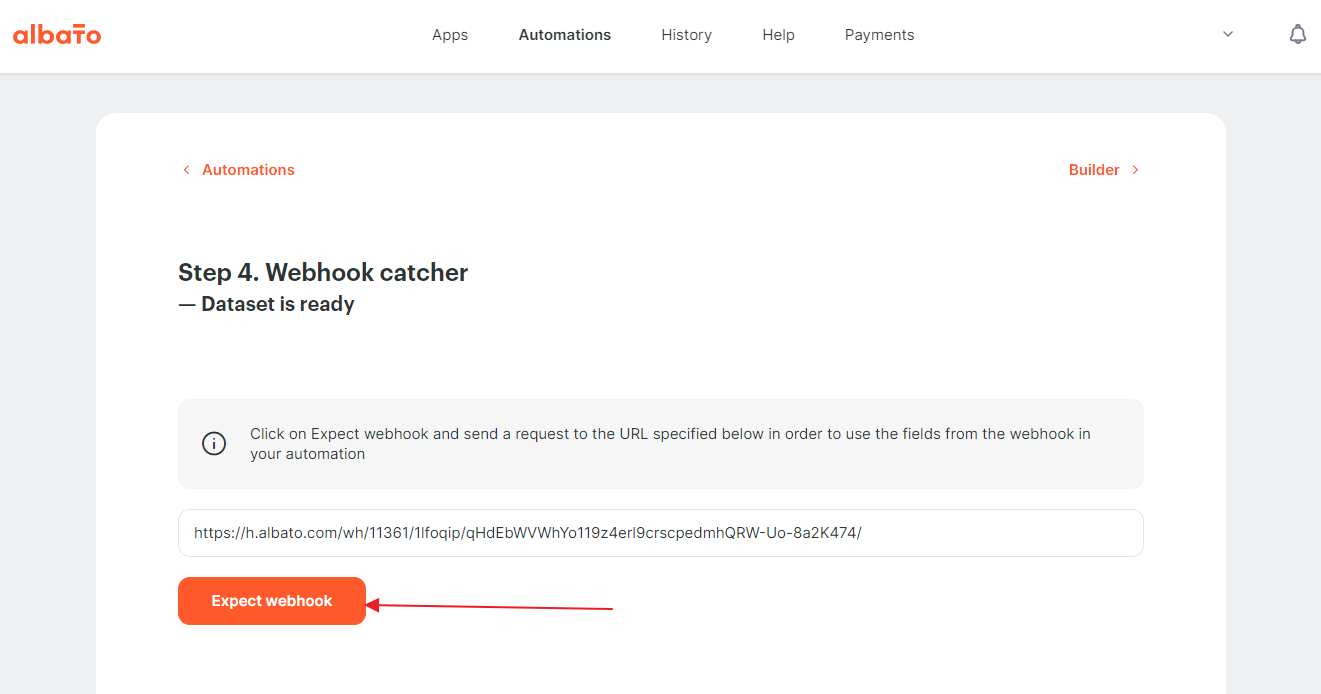
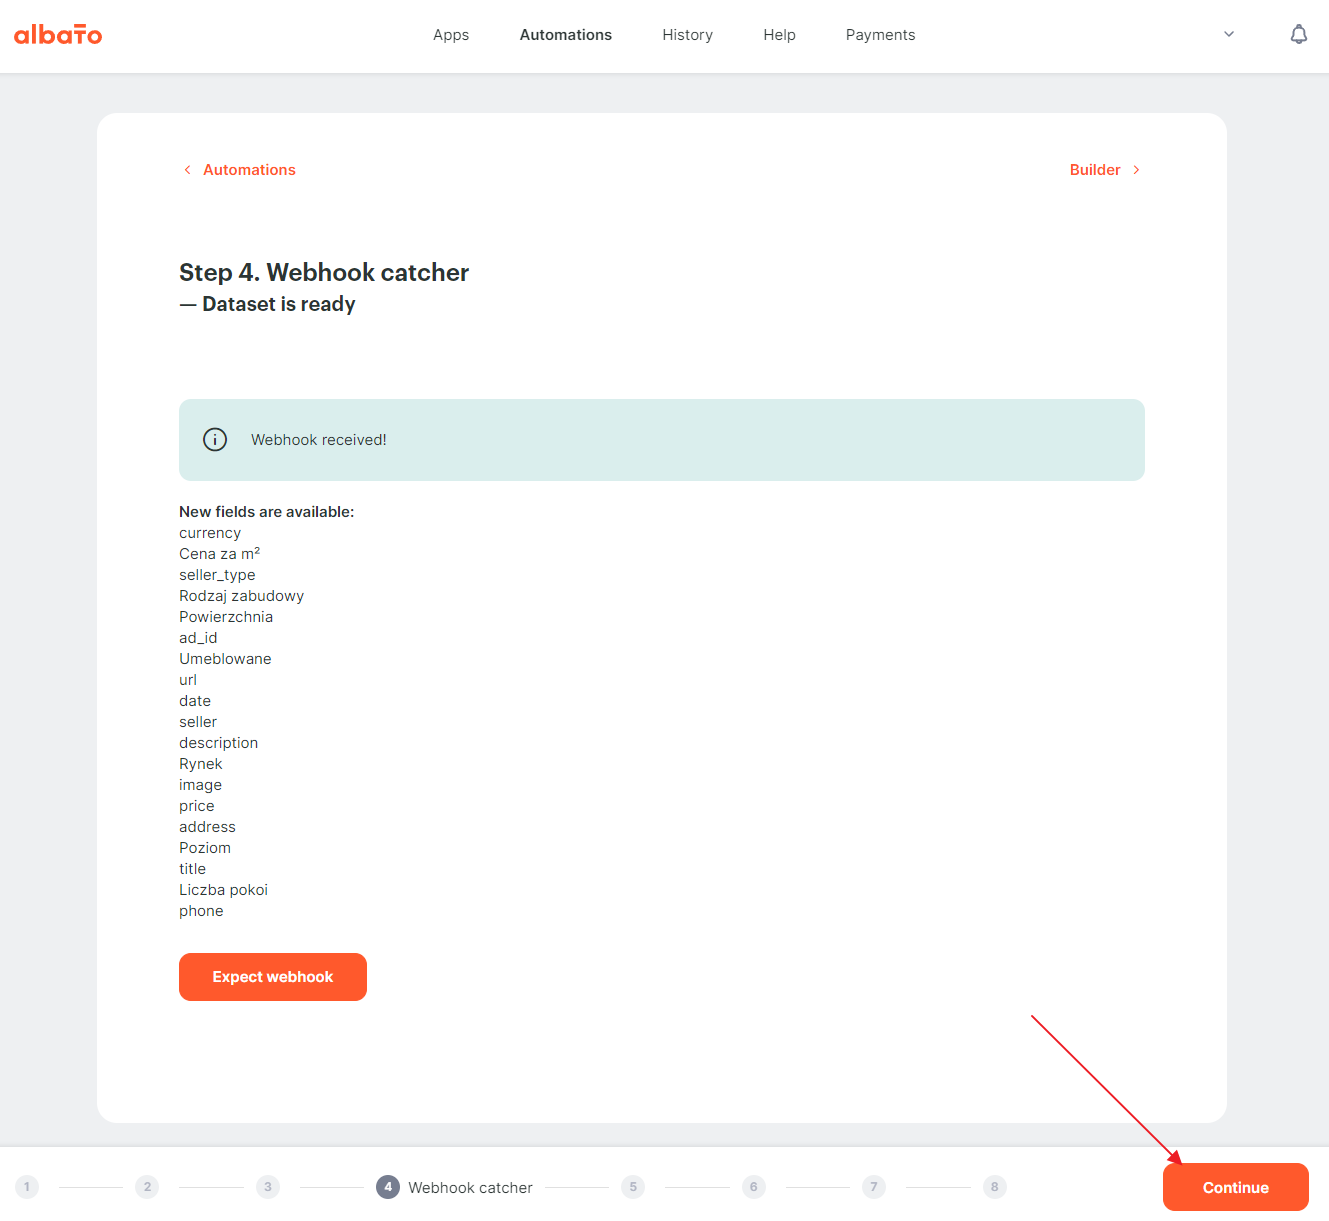
At this step, we need to configure the list of fields to receive. And we will use the hook catcher to do it. To activate it, you have to click on the “Expect webhook” button.
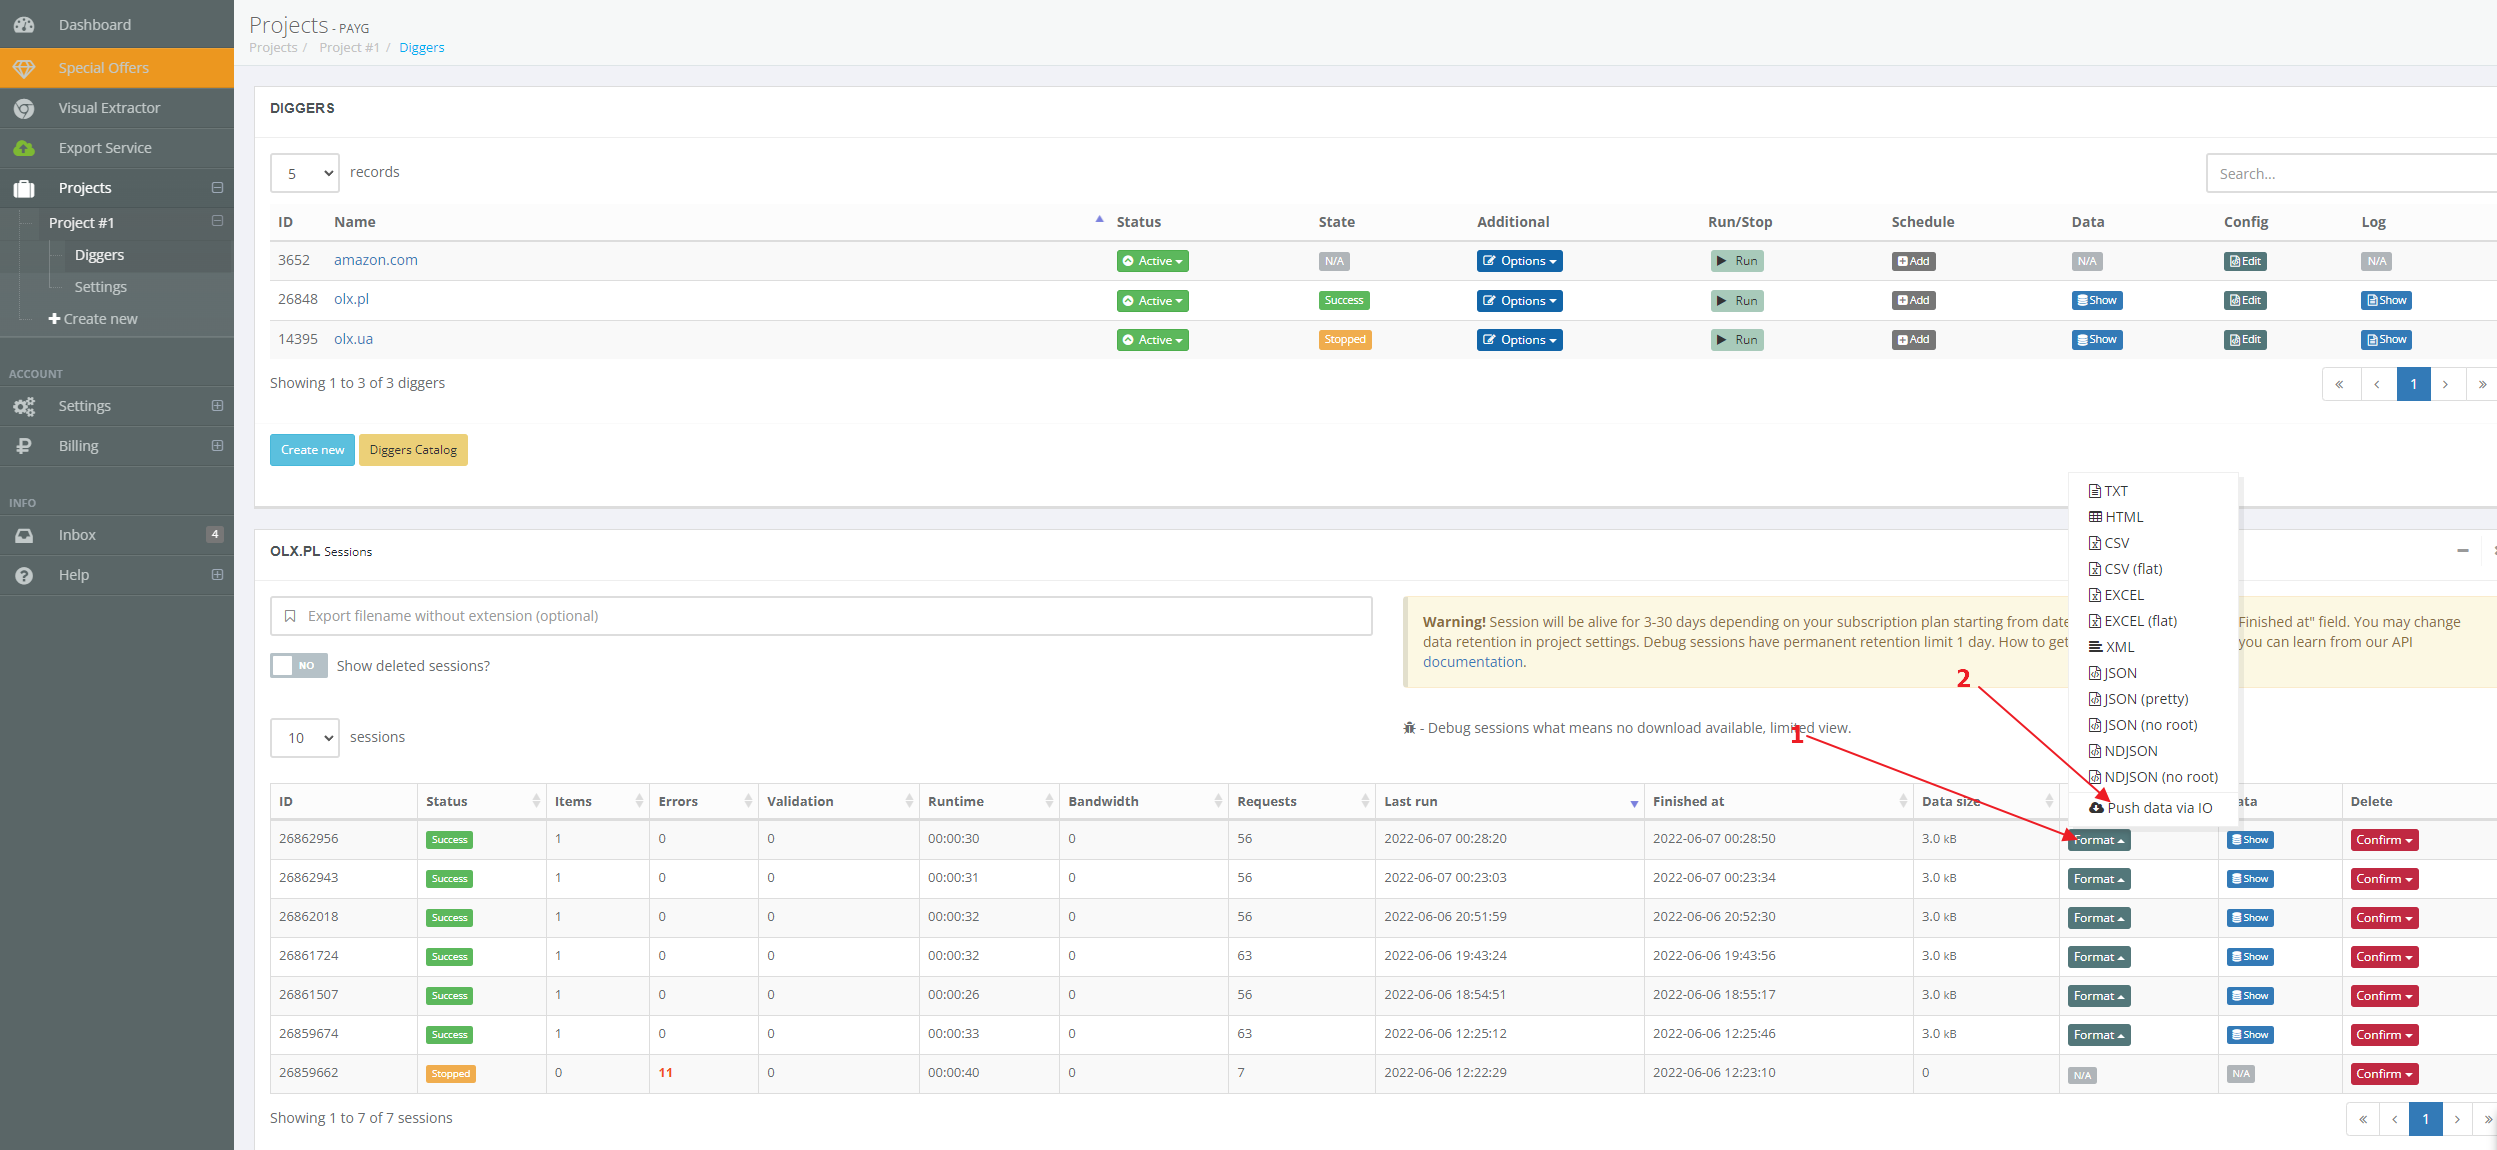
After activation, we need to send a dataset with data. To do it, we have to return to our Diggernaut account and go to the diggers list to manage the digger which we set up the export. If the digger has no data sessions, we just need to start it, or, if you have already started the digger before and the digger has data sessions – you can go into sessions section.
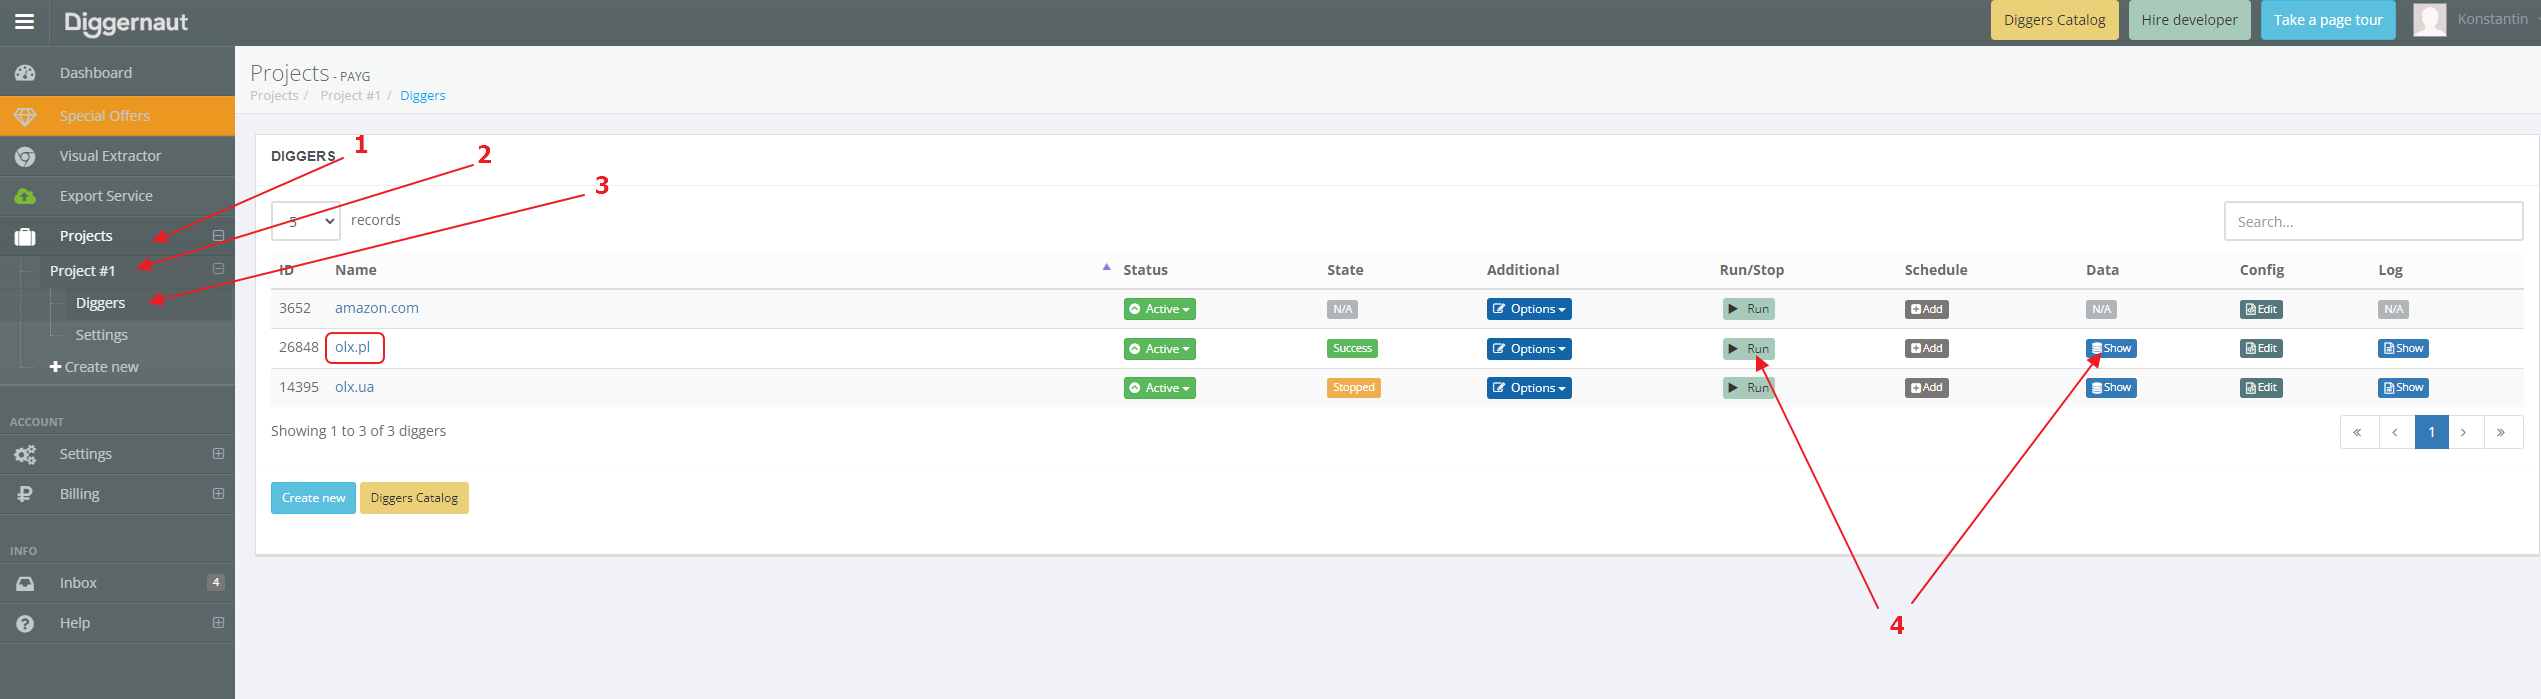
And send a dataset of any session to Diggernaut.io.
Depending on the size of the dataset, the export will take from several seconds to several minutes. After that, we should see the fields caught by the catcher on the Albato page. After that, we can continue to configure the mapping.
Now we need to specify where our data will be sent. We chose Google Sheets, but you can choose any other service available. To do this, we choose the service where we send the data, the method by which we will do it (different services have different methods), and establish a connection to that service. Different services may also have additional connection parameters, which you will also need to configure.

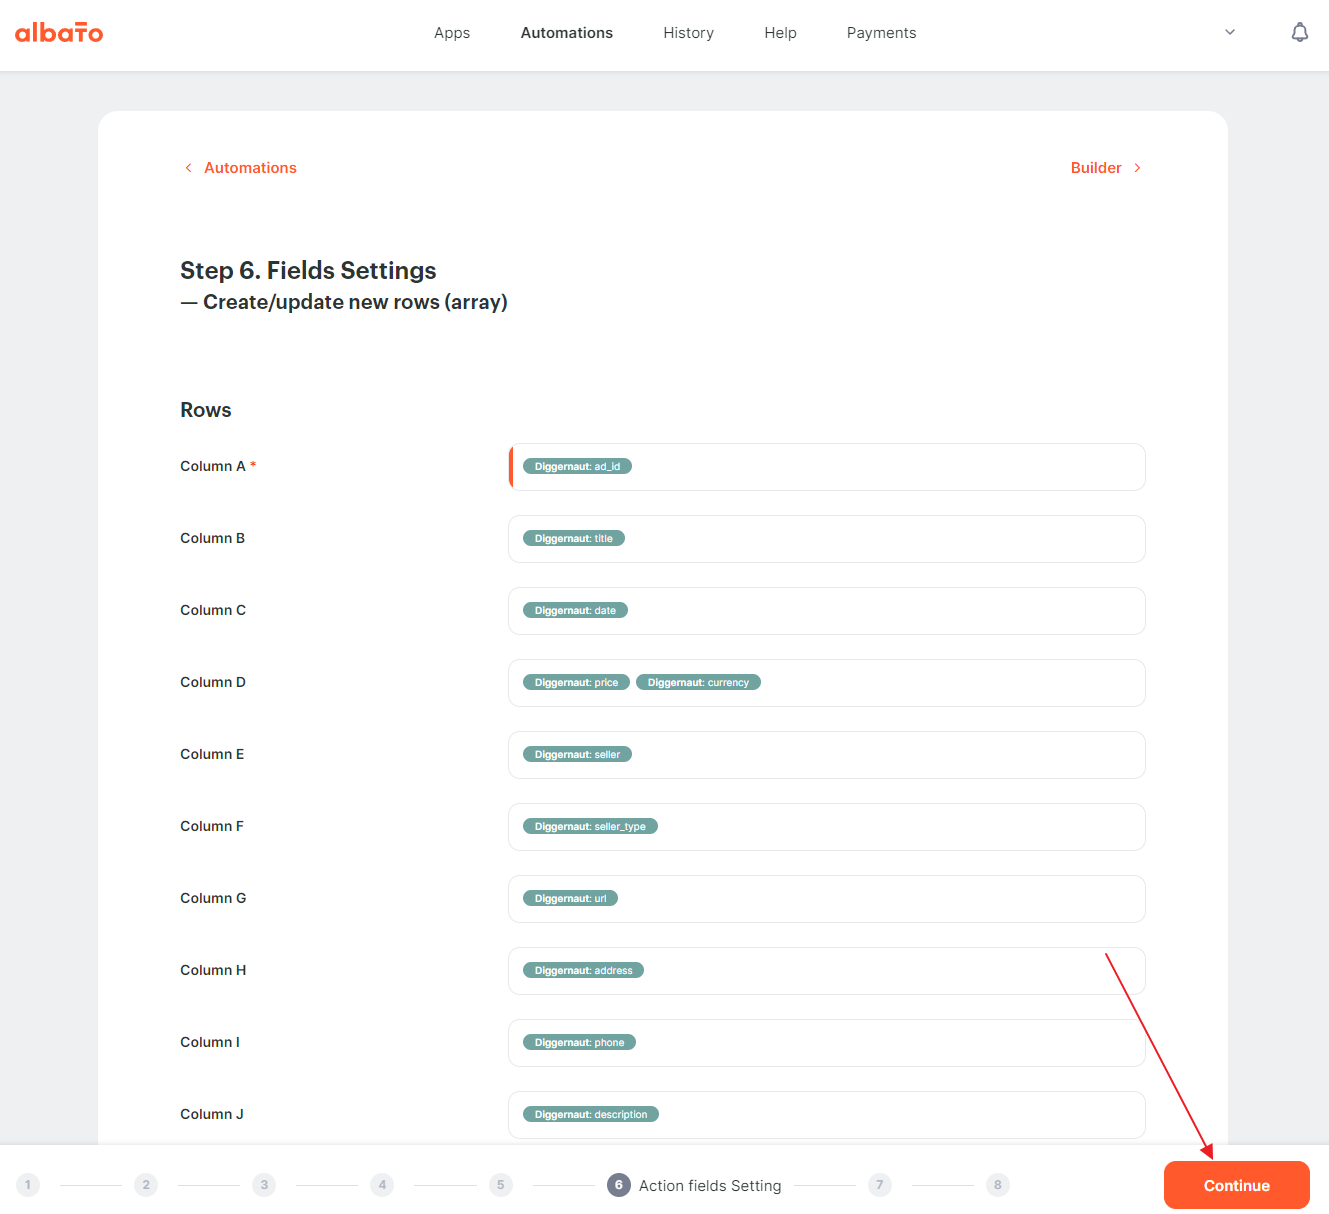
Now let’s start the process of mapping dataset fields.
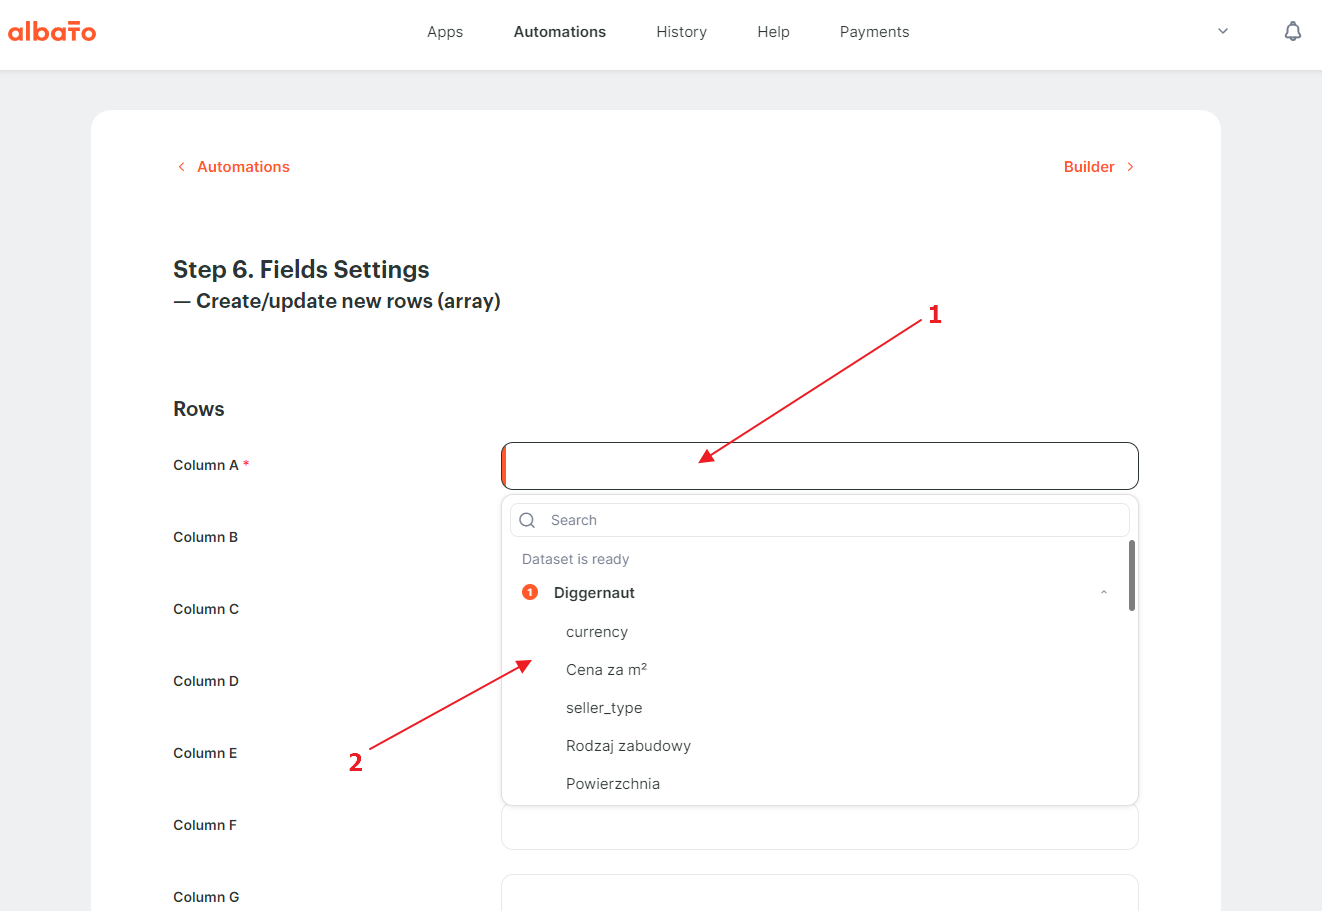
Bind all the fields that we are planning to export and click the “Continue” button.
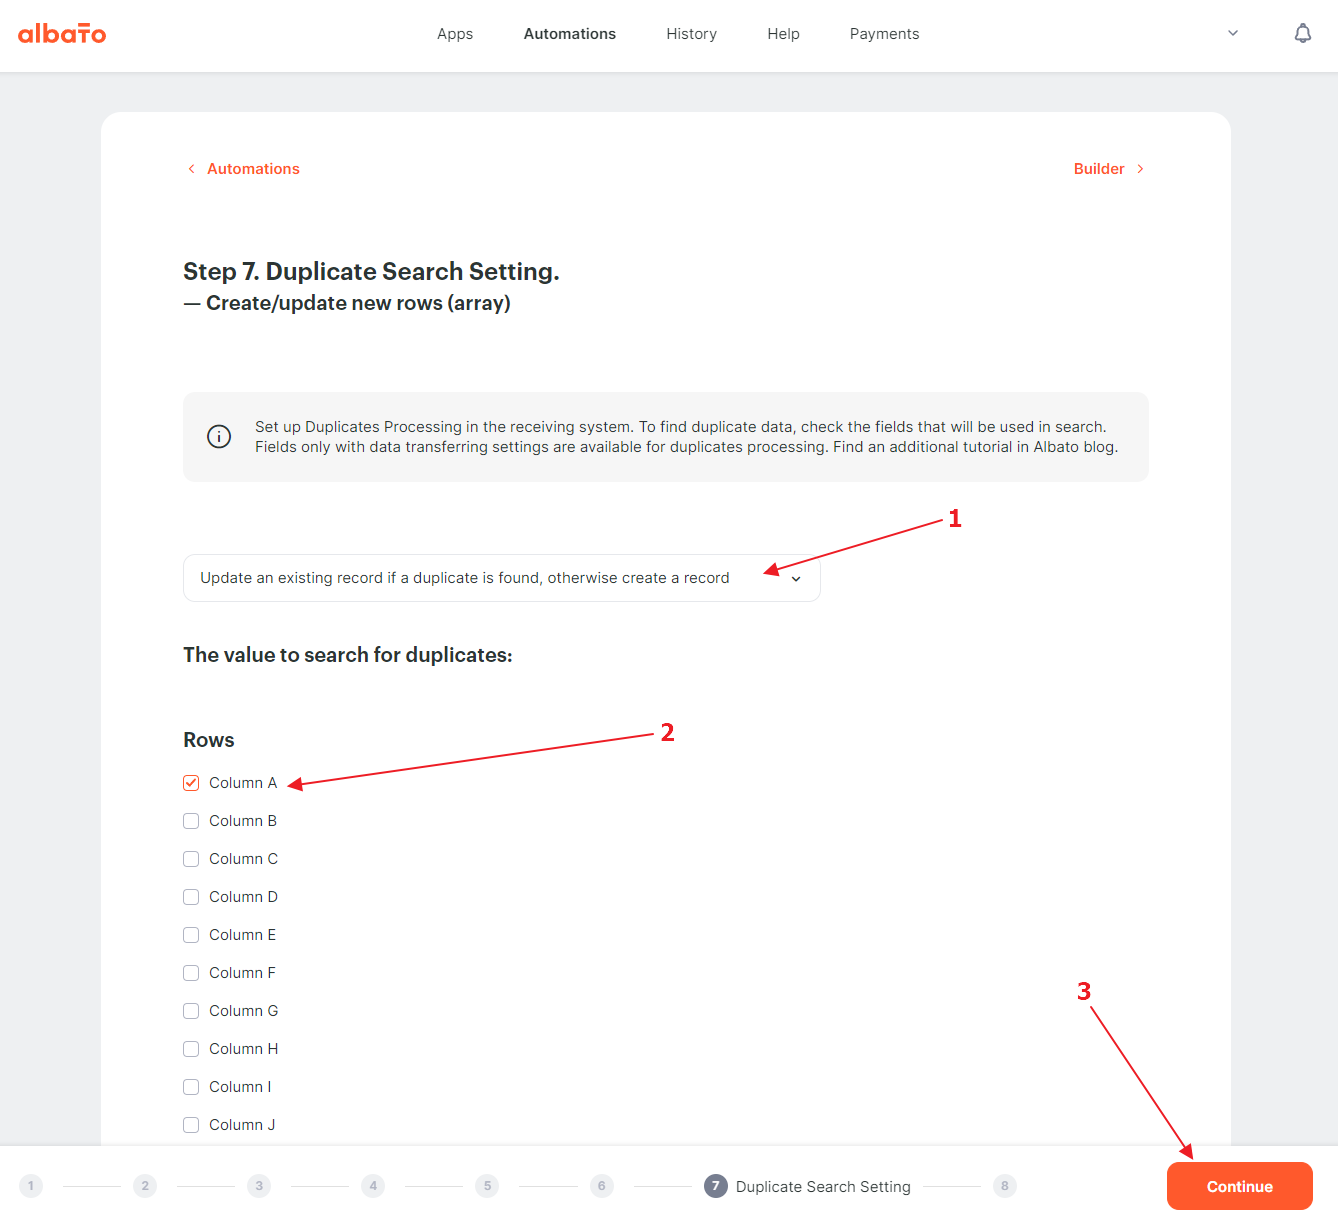
If necessary, we configure the mechanism to search for duplicates. In our case, in column A we have a unique ad ID, so we can configure the search for duplicates using the value of column A.
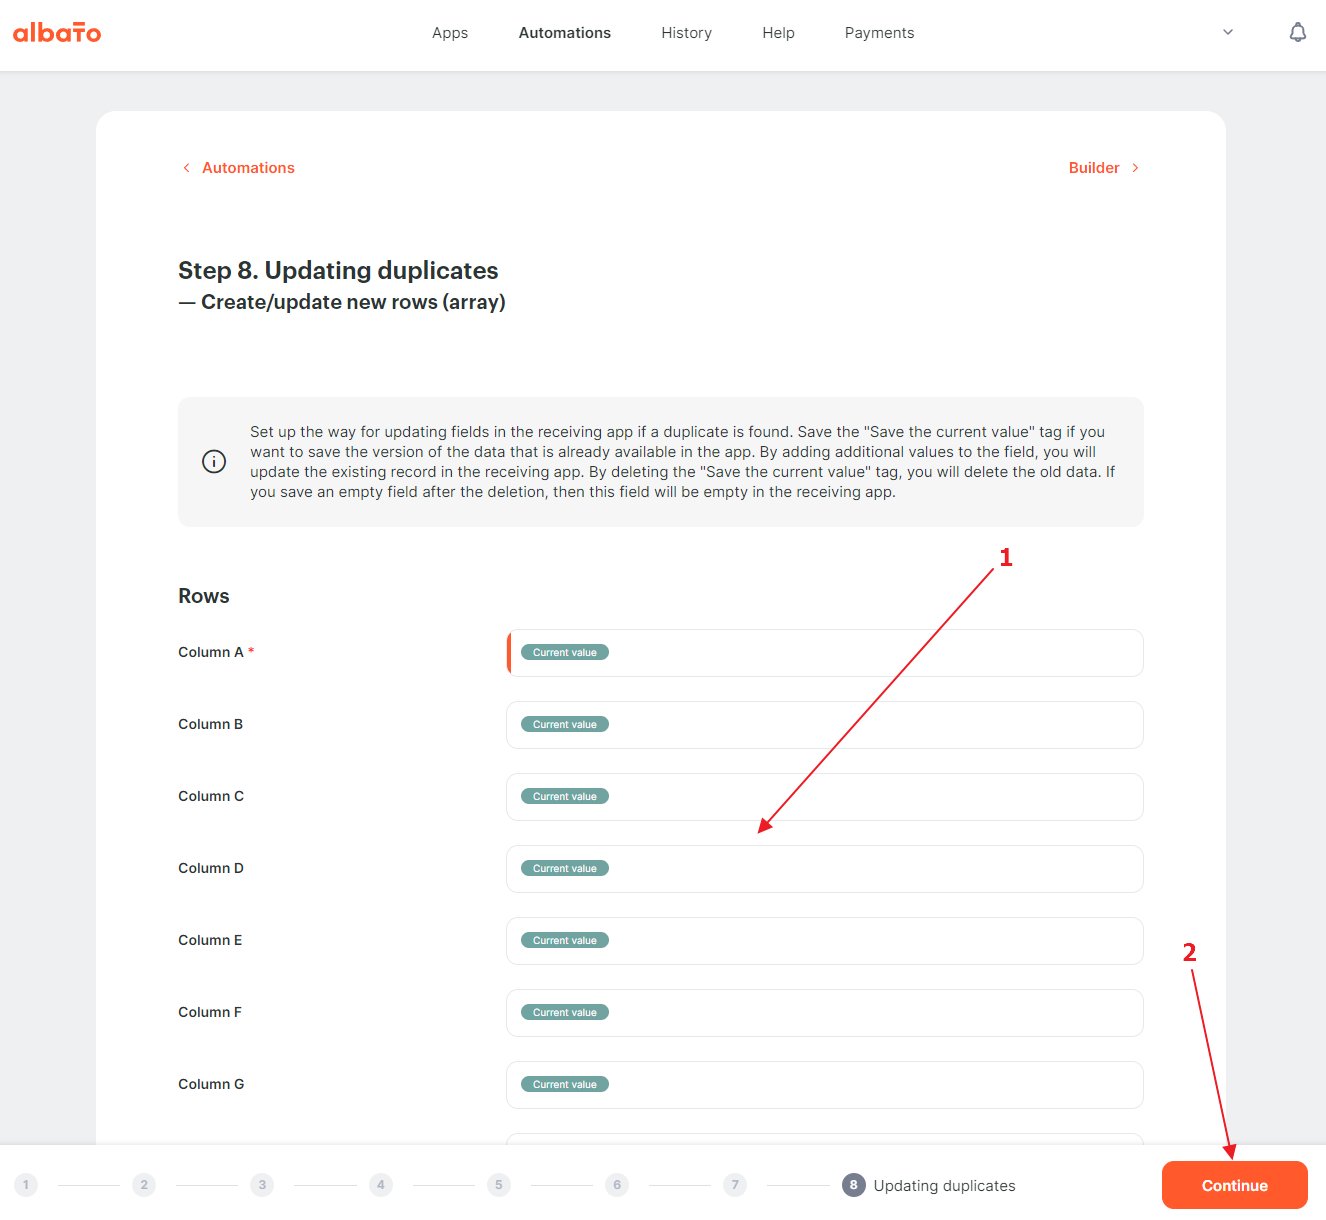
In this step we can choose which fields we will update if we find a duplicate and which we will not.
The configuration of the automation is complete, all that is left is to start it.
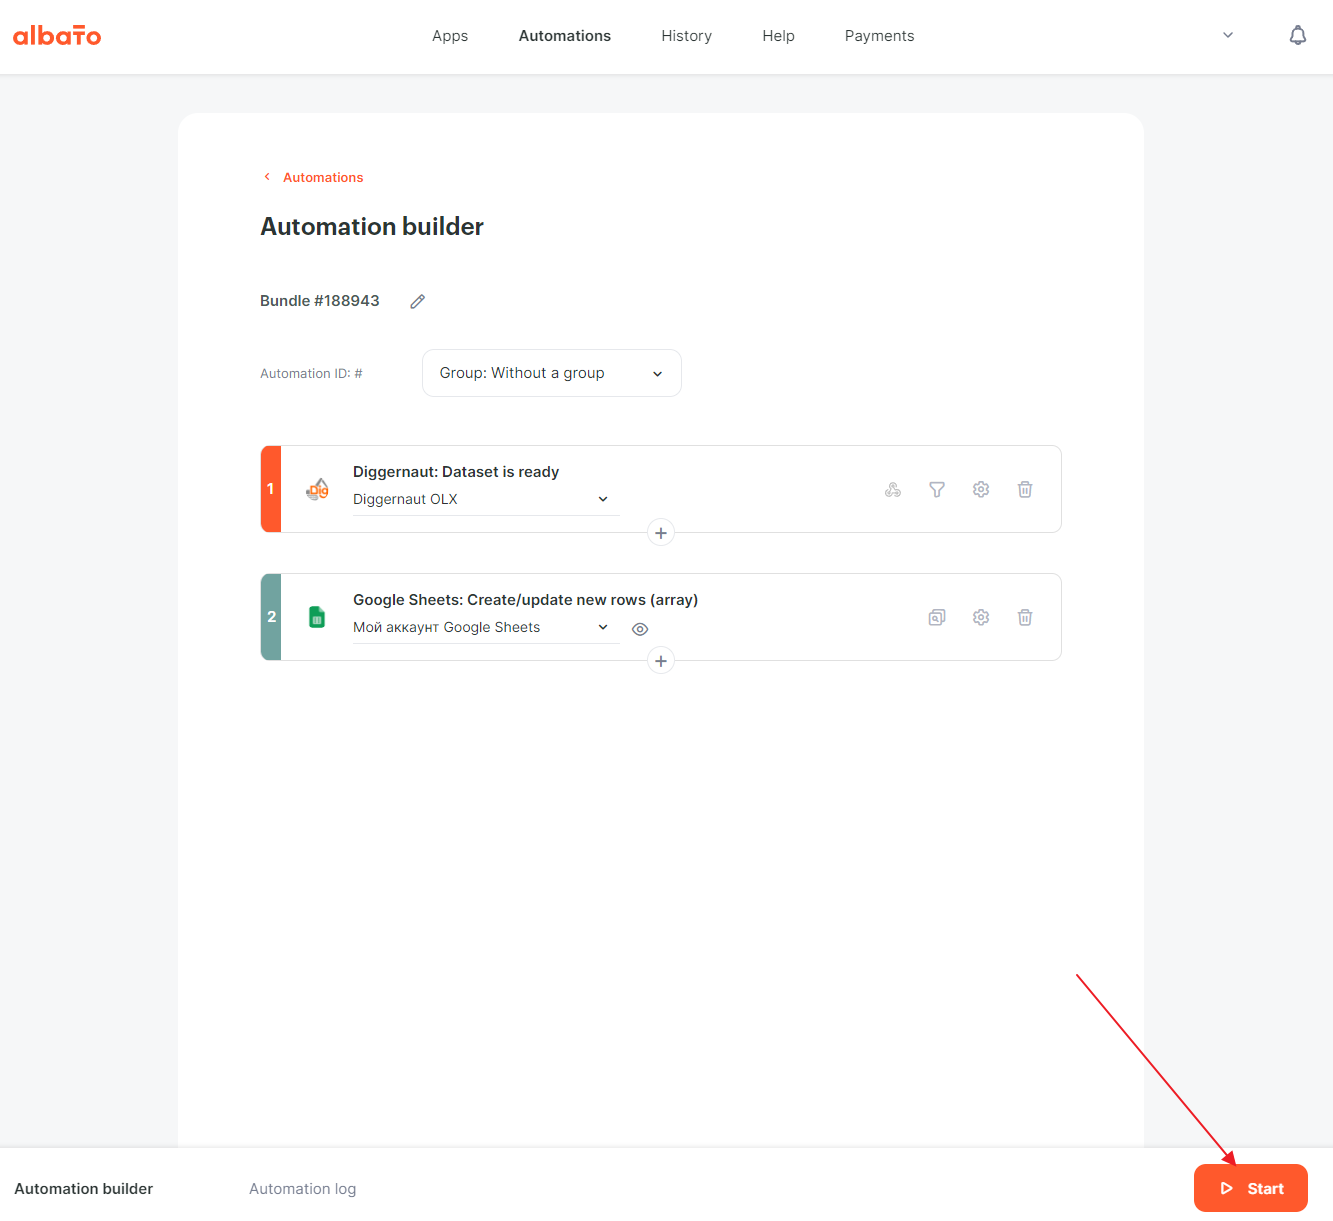
Now after each digger run, when it finishes, Diggernaut will send a dataset to Albato, and Albato will take care that the data reaches its destination.